You are Smarter Than all of Ford’s Engineers
All sorts of nagging problems seem to be getting solved here. God’s grace in action.
My car has been annoying me. It’s a Ford Explorer. These cars have some really stupid–I mean seriously stupid–engineering.
1. They put a foam rubber cover on the engine. It has a very high R-value, so it’s like putting several inches of attic insulation on the motor. The general rule throughout the automobile age has been that you want your car to run hot enough to do its thing well, but no hotter. You don’t want to roast everything under your hood, like your expensive battery and all the weak modern plastic parts that eventually crumble after a lot of heat cycles. You don’t want to have to strain your cooling system to get rid of heat that would happily leave on its own if permitted. My car was designed so a rubber blanket would keep it hot while a complicated cooling system tried to get rid of the same heat. I have placed the engine cover where it can keep the garage floor warm.
2. They put the water pump–a cheap part that fails often because Ford makes junk on purpose–inside the engine. That sounds like something out of Dilbert, but it’s completely true. In about 1985, the water pump on my gorgeous 1970 Buick deuce-and-a-quarter convertible died, and with almost no mechanical skills, I replaced it by myself in an afternoon. The cost was probably around $30. The cost of replacing a Ford Explorer water pump can be as high as $4500 if you’re stupid enough to go to a dealer, and even private mechanics sometimes charge half that much.
Explorer engine pumps fail very, very often. So do their gaskets. The design is amazing. There are two gaskets, one inside the other. When your inner gasket fails, coolant goes out of the car through a hole between the gaskets. You’re supposed to see this even though it happens under the car. When the outer gasket fails, coolant goes into your oil pan.
Hey, I’m no engineer, but let me spitball here a minute. My car has about 8,000,000 sensors, most of which were a bad idea to install. Why not have a coolant level sensor instead of using ME as a sensor?
Why not use three gaskets? Why not 4? If you’re determined to go stupid, go big. Maybe a lot of Explorer engines with three bad gaskets and one good one would still be running.
You read the stuff about the oil pan right. Ford designed its water pumps to shoot coolant into the oil pans of running engines. Guess what you have to buy when that happens? Starts with an “E.” For “Edsel.”
My car is probably worth $18000. Cost of a new “E”? Call it $8000 if you’re really lucky. Then you have the same kind of engine that committed suicide once already.
3. The car has shutters on the radiator. What can you say about a feature that dumb? At highway speeds, they close. That means you also paid for a shutter motor and a bunch of electronics and programming. When they close, the drag coefficient of the car drops by about 0.01%, and you gain half a mile per gallon. Look it up. I’m not lying. This is Ford’s way of trying to cope with ridiculous mileage mandates which, ultimately, come from allowing women to vote. Don’t get me started. Although I already am.
What happens if the shutters close at the wrong time, which they obviously will, because there are trillions of Explorers, and that’s how probability works? The radiator won’t get air. Personally, I would rather lose the half-mile per gallon, since this car gets bad mileage anyway, and not bake everything in my engine compartment.
My car has been sending me false overheating signals. This is disturbing, because when it happens, all you can think is, “IF I DON’T PULL OVER IN THE NEXT MINUTE, IT WILL COST ME TEN THOUSAND DOLLARS.”
Lots of bad things can happen when a car overheats. You can lose an engine. You can get hidden damage that causes you to lose the engine later, long after you congratulated yourself on dodging a bullet.
The car started beeping on a very hot day while I was in a Burger King drive-through. I went in and ate, and when I came out maybe 15 minutes later, the car was miraculously cool. That’s not long enough for a car to cool down.
I started out of the parking lot, and the temperature gauge shot up. Too fast to make sense. I got out of the lot, and it dropped within maybe 15 seconds.
I checked the coolant level, it was low. I topped it off. The car behaved for a while. Then it beeped again while the wife and I were running errands.
I started Googling. I interrogated people on a forum. I thought I might be looking at a second thermostat replacement, and I considered using a cooler thermostat than the super-hot job Ford installed.
The coolant level dropped again, after one day, so I bought some fluorescent dye and a UV flashlight. If there was a leak, I would be able to find it under the hood.
I added dye. I drove around. I saw a lot of coolant spillage lighting up under the hood. It occurred to me that I might have spilled dye myself, so I hosed everything off, topped off the coolant, and ran errands on a blistering-hot day.
Nothing happened. The coolant level stayed high. I saw no leaks.
I can’t figure it out, but it looks like I don’t have a problem after all. Maybe the people who replaced the first thermostat left the coolant low, and over time, it got so low it messed with the temperature sensor. Maybe the coolant level dropped after I added the first dose because it was being sucked into the system.
I don’t know. I do know I was planning to take the car to a shop tomorrow, and now that’s off. I bought a third thermostat and some coolant and distilled water, so I plan to flush the system. I’m hoping the car doesn’t really have a problem.
I was actually starting to look at Toyota Highlanders on the web. The Highlander is supposed to be a better car. Every car has weak points, and the Highlander is no exception, but not every car has a water pump inside the engine. A water pump which is known to go bad frequently. Along with a timing chain which has a predicted service life of 100,000 miles.
A modern car should go 300,000 miles without major problems if maintained well, so what kind of fool makes a car with a 100,000-mile timing chain that costs thousands to replace?
A Highlander timing chain is very expensive to replace, but on the other hand, Toyota says there is no recommended interval, so that means they don’t expect it to fail at 100,000 miles. I don’t know what Ford says. I don’t feel like checking. I do know that people all over the web say it’s a maintenance part, like a spark plug or air filter, as contrasted with a lifetime part, like a rear differential.
A maintenance part. Deep inside your engine. It’s like doing a tonsillectomy through your butt.
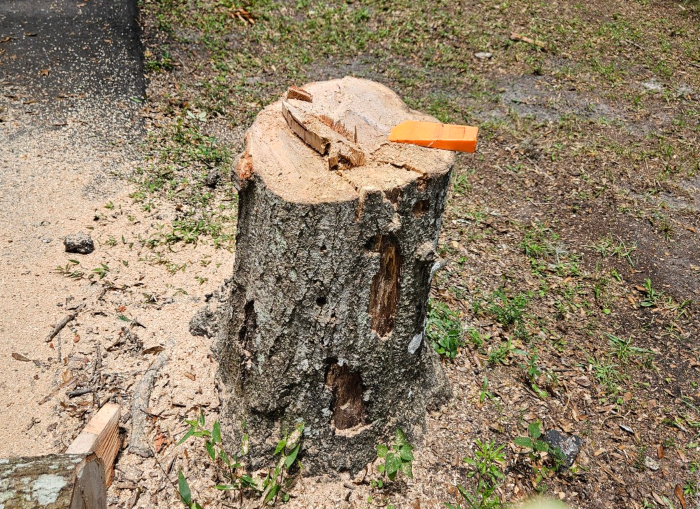
I think I got my Makita cordless chainsaw fixed.
The saw was running dry. It has an oil tank like a gas saw, and it has the same sort of pump, sending oil to the bar and chain through a hole in the saw body.
I was afraid the $22 oil pump had failed.I took the bar off and cleaned a lot of crud out, hoping crud was blocking the oil. Better than waiting for a pump.
I ran the saw with the bar off to see if the pump worked, and oil dripped out of the saw body, as expected. It seemed like less oil than a gas saw would drip, but that is supposedly normal. I closed the saw up and used it to move an oak I felled by the driveway.
Today I looked at the saw and noticed that the bar was blue around the edges, which some people say is a sign the saw ran hot and toasted the steel. Others say bars are blue from the factory because they harden the edges where the chains run. I don’t know what the truth is.
I opened the saw up again and saw something amazing.
When cleaning saw oil passages up in the past, I have thought mainly about the saw bodies. Wood dust jams into the little slots the oil comes out of, so you knock it out with something and go on. Exactly what I did the first time I checked the Makita.
What I did not know was that fine dust and bar oil could harden and turn into something like wood filler or just plain concrete.
On the bar itself, I found little accumulations of hardened dust shaped just like the oil slot. When the saw was closed up, these accumulations pressed into the slot and sealed it up like a gasket.
I had to scrape the bar itself. It took a while. That stuff was hard.
I learned something. When you run a saw, before you do anything, floor it with the bar pointed at something. If oil doesn’t spray onto whatever you’re aiming at, fix the saw, because the chain is dry. You can have oil dripping from the bottom of a saw without getting any on the chain.
I have 5 saws on the premises right now. I have had so many saw problems, my former biggest saw has an old bar that has been run so little, it’s practically new. Another saw is actually new. The rest needed to be sharpened. I knocked that off.
I generally use files, but I decided to try Pferd sharpeners because they file not just the teeth, but the depth gauges, which are the pointy things between teeth. Gauges tell your teeth how deep to cut, and if you keep filing the teeth and not the gauges, you end up cutting with the gauges alone, and that’s not very fast.
Pferd sharpeners are almost exactly the same as Stihl sharpeners, but when I got mine, they cost way less.
Sharpening your saw is very important. A dull chain can make a 70-cc saw cut like a 30-cc saw, and if you don’t know it’s dull, you may think a bigger saw is the answer. You may spend money needlessly. Also, a dull saw can make a saw overheat, destroying the piston, cylinder, and maybe some other stuff. A small saw with a sharp chain is better than a big saw with the kind of chain most people use.
Speaking of things that are better than a big saw, I have a phenomenal tip for you, born of experience. Buy a cordless pole saw, not a chainsaw. You probably don’t even need a chainsaw. They’re only appropriate for firewood and thick trees. No one says this, but it’s 100% true, and it should be considered canon by now.
With a 10″ pole saw, you can cut trees 12″ thick. Not gracefully, but safely and effectively. You don’t need a 16″ chainsaw, the homeowner’s preferred size, unless you’re cutting bigger stuff.
With a chainsaw, you have to stand right next to what you’re cutting, and believe me, you will make mistakes when you try to guess which way things will go when you cut them. The farther away you are, the safer you are. With a pole saw, you can be 6 feet or more away from your stupid mistakes.
Most chainsaw tree-whacking injuries occur within a couple of steps of the cut, and if you have a pole saw, you’re already two steps away when you need to run. This is a very, very big deal no one talks about.
If you have a pole saw, you can cut things higher than your shoulders. “I’m already doing that.” Yes, I know. You’re an idiot. You never raise a chainsaw above your shoulders. What do chainsaws do when operators have problems? They fall. They don’t levitate and fly away. The lower a saw is when you use it, the better off you are, because less of you is where it may fall.
When you cut your leg off with a chainsaw, why does it happen? It happens because the saw was higher than your leg when you had your problem, and because a chainsaw is so short, you were able to keep your finger on the trigger while the bar was cutting you.
If you drop a pole saw, it’s pretty unlikely the bar will come near you on the way down. Cutting your leg with a pole saw is virtually impossible.
You’re supposed to wear safety chaps when you use a chainsaw. They really work, and no one uses them. They’re hot, and they look kind of gay. If you’re using a tool that can’t cut your leg, the fact that you refuse to wear chaps won’t be a problem.
Even safety experts have no issues with operating pole saws overhead. It’s what they’re for. You can even use one from a ladder. You never, ever use a chainsaw from a ladder.
A pole saw will always turn off when you let go of the handle, and you have to let go of the handle in order to get near the bar. It’s brilliant.
You also get less sawdust on you when you use a pole saw because it’s not ejecting things directly at you from one foot away.
If you go cordless, you will never need ear protection. That’s a huge bonus. Earmuffs cause painful headaches, they’re hot, they may eventually smell, and they’re disgusting because they’re filthy. And they don’t really protect your hearing well. With a big saw, you also need plugs.
Unless you’re cutting things over 12″ thick regularly, or you’re cutting firewood, you don’t need a chainsaw, even though they’re cool and you want one. You should get a 10″ Kobalt battery pole saw from Lowe’s for less than the price of a homeowner-grade Husky 16″ gas saw that plugs up with ethanol gas at least once a year. Get an extra battery. Do it, and you will almost never need to reach for a chainsaw.
It’s so much safer, it’s in a different safety universe. It’s cheaper. It works better. It’s easier on your back. It can do lots of things a chainsaw can’t do. It can do nearly anything a chainsaw can do.
You won’t even have to adjust the chain. The saw does it for you.
You want it.
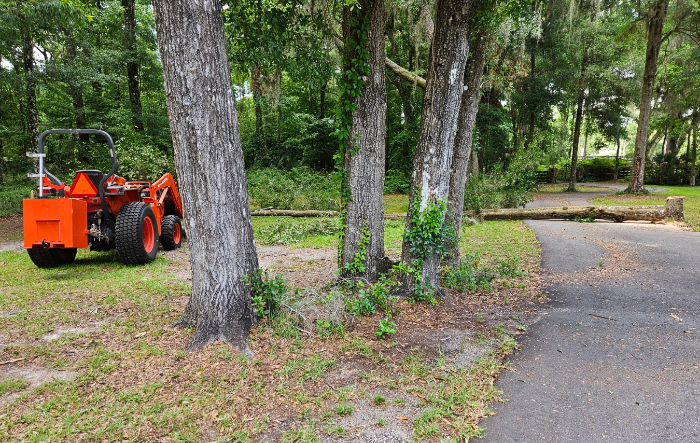
I have a tree crew coming this week to do major cutting and moving so I will never need hurricane insurance again. They need places to dump wood for burning, and they need to be able to get to the back of my shop, where some of the worst trees are.
I had two big piles of trash wood waiting to be burned, so yesterday, I called for a permit. They told me I could not have one. They said dispersion was too low. What?
I found out this meant there was not enough wind to disperse the smoke, and they were worried that soy people might get a widdle cough.
They said I could take a $50 course and become a second-level burn pile guru, and then they would give me permits when other people could not get them. I checked online. No courses were available. NICE.
Help me understand why being a burning expert should entitle you to burn more wood than other people. It produces the same amount of smoke. It must be a gimmick to direct money to the government or some contractors who bought the government some escorts.
Look how smart old people are. A young person would still be wondering.
Being old means you know how the world really works. This is one of the best parts of being old. And one of the worst.
I called today before 7 a.m., thinking they were more likely to be nice to me if I showed I was serious. They told me it was too early, so I called again at 7. I got a different person. Not the masculine-sounding lady who had been so terse and authoritative in the past and probably wears plaid shirts. Yes, I’m insinuating something. Just a guess.
The lady I got could not have been nicer. Same weather, but I got my burn permit anyway.
Now I have two smoldering circles of ash, and I won’t have to sacrifice pasture needlessly for extra piles.
I took the tractor out and moved all sorts of junk from behind the shop. My bush hog. Two rolls of fence wire. A bunch of treated lumber. A hay bale spike. A subsoiler. My debris fork. My tractor bucket. A harrow. Now there’s lots of acreage back there so they can get their machines in.
I was afraid I would need my truck because of the car’s problems, and it has refused to turn over. I finally decided to address it. I am charging the batteries up, and I checked the wiring. Yes, the horrible squirrels have nibbled a bit, but not enough to prevent the truck from running.
I think I have a ground issue, so I’m going to clean and grease every ground that looks relevant, and I’m hoping to get the truck going by Wednesday.
I also decided to check out a problem I had been dreading dealing with. My truck’s 4WD shift has been swinging freely as though it were not connected to anything. I got under the truck, and guess what? It’s not connected to anything.
Remember what I said about stupid engineering? Dodge makes these trucks so the transfer linkages fall out with no warning. A linkage is a funny-looking rod, and it has two weak bushings at the ends. The bushings WILL fail even if you don’t use the transfer case, and when they do, the linkage goes away without telling you, perhaps hitting the car behind you as it tinkles and bounces down the interstate.
I have parts ordered. I’m thinking of finding a way to make sure the linkage can’t fall out again. Dodge’s engineers couldn’t do it, but I can, because IT’S REALLY SIMPLE.
Dodge wants something like $60 for the parts, but the Chinese sell basically the same thing for $15. They’re all over Amazon because THEY FALL OUT ALL THE TIME AND DODGE CAN’T FIGURE OUT HOW TO STOP IT.
I looked up my Harley’s value, and I plan to put it on Craigslist so I can get the truck indoors away from squirrels. The title is around here somewhere, and as soon as I find it, goodbye, Softail.
I also found myself and my wife better car insurance. By going from GEICO to State Farm, we can cut over 50% from our bill and get nearly the same coverage. Insurance rates are insane. One company wants x. Another company wants 0.5x. Another company wants 3x. A 4th company will not insure anyone in Florida, for no clear reason. Rates bear no relationship to reality that I can perceive. I guess we’ll switch tomorrow.
Things are coming together. With God’s help, the car won’t blow up, the tree job will go smoothly, the truck will roar again, and my chainsaws will again be useful as well as ornamental.