Archive for the ‘Tools’ Category

Latest Chinese Bargain

Sunday, August 12th, 2018

Even my Time is Worth Something

Yesterday I wrote a long piece and then decided not to publish it. Basically, I had noticed something about my dad. He woke me up yesterday, yelling from downstairs. He wanted to go out to breakfast.

When I walked out of my bedroom, he was angry at me. We had not said good morning to each other yet. We had not interacted at all, and he was already mad. That made an impression on me. I thought about his nature; what an angry person he is. Who gets mad at people because they don’t come to the door instantly when you yell for them? That is far from normal.

Also, even if you’re upset, how can you feel entitled to yell at someone over something like that? The fact that you’re upset entitles you to nothing. It certainly doesn’t entitle you to make other people suffer.

When you deal with someone who mistreats others habitually, you have to sit back once in a while and take stock. If you’re not careful, you will start to accept their behavior. You will stop seeing anything wrong with it. That’s not good. When that happens, you sort of decide you’re a toilet for other people to dump in.

I told him we weren’t going to breakfast and went on with my day. He wants to go to a restaurant for every meal, and I want to go to a restaurant about three times a month. I have other things to do. If I let him call the shots, we would spend $20,000 per year on restaurant meals, and dining with a dementia patient is taxing.

I have trained myself to say “no” a lot, and I have also learned that it’s okay to walk away while he still wants to talk. He can turn a two-minute conversation into 20 minutes of confusion and yelling. Sometimes I have to walk off and let him wind down on his own. Later in the day, he won’t remember it, and it will make no difference.

He wants to eat out because he’s bored. I have learned that his boredom is not a crisis I have to respond to and mitigate.

He’s going to be bored a lot for the rest of his life, because he has dementia. That’s normal and inevitable. Even if he were in a home, they wouldn’t be able to hire jugglers and minstrels to keep him and the other patients amused at all times. Sometimes life brings you problems you can’t fix. I make a good effort to spend time with him, but after a couple of hours, I have to rest. I can take a certain amount of exposure, but then I have to get away from it.

I wrote about this, and it turned into a very long essay. I decided to file it. This is why you didn’t get to read anything new yesterday.

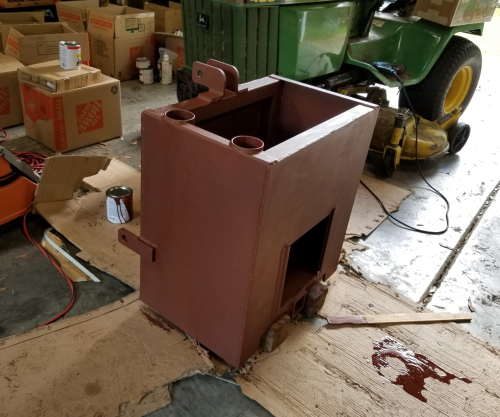
Today has been productive. I primed my ballast box and changed the oil in our SUV.

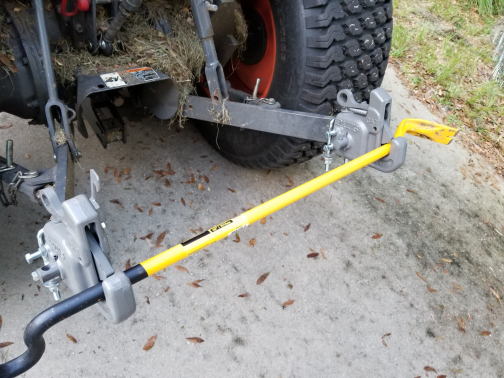
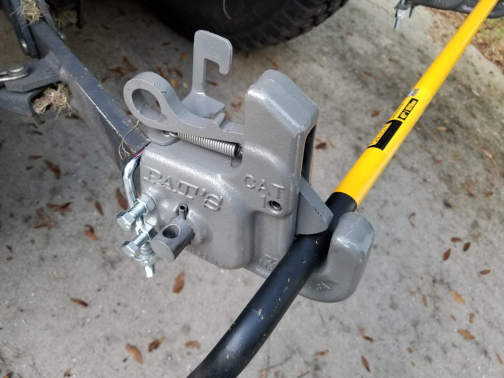
I bought a Titan ballast box for my tractor. This is a steel box that holds sand or other heavy things. You use it to balance your tractor so it works better and lasts longer. I found it impossible to get one of these things delivered without damage, so I got the seller to give me a discount which I applied to paint.

This was by no means a good deal. The box should have been ready to go out of the box. I got a $30 discount, I’m going to end up spending $50 on paint and brushes, and I’ll do a lot of labor in the process. At least I’ll have the box.

These boxes arrive with damaged powder coating, and the hand-done Chinese welds are so bad they may need grinding. If it weren’t for these problems, they would be very good deals. As it is, they’re merely better than the overpriced competition.

You can make your own ballast by putting three-point hitch connections on a block of concrete, but I didn’t want to fool with that. In retrospect, I probably should have. It would have cost $50, and I would have worked less than I’m working now.

I’m painting the box with Rust-Oleum farm implement paint. I don’t know how good this paint is. I was advised that I had to prime the box even though it already had powder coating on it, so that’s what I did today. I sanded all the surfaces I’m painting (except for the inside of the box, which will be full of sand), and I applied primer with a brush. I’ll post a photo.

I’m not going to paint the bottom of the box. At least I don’t think I will. It will not be visible, it’s a pain to get at with a paintbrush, and even if I paint it, it will look bad because every time I put the box down, paint will come off the bottom.

One benefit to all this aggravation: my box will be Kubota orange. The Rust-Oleum people are not stupid. They know Kubota and John Deere own most of the market, so they make paint that matches the familiar orange and green.

I got this behind me, and then I gritted my teeth and changed our Explorer’s oil.

Oil-changing technology has changed since the last time I shopped for oil-changing tools. They have really neat catch basins now. I bought one which holds 5 gallons. It’s a big flat bowl about two feet wide. It has a rim that curves back into the bowl to keep oil from sloshing out. There is a neck molded into the rim, like a jug neck. The neck has a screw cap on it.

You slide the bowl under your vehicle, drain the oil into it, slide it out, open the cap, and use the bowl’s neck to pour your oil into a container so you can take it to the auto parts store for disposal. It’s neat.

The Ford is not set up all that well for oil changes. It’s not a real SUV, like an Expedition. It doesn’t have 4-wheel drive, and the ground clearance is not great. The low stance means you can’t get under it very well to reach the oil filter and plug.

I found I could get to the plug and filter if I turned the wheels to the left and crawled into the right wheel well. It was tight, but it beat buying ramps.

The last time this thing had an oil change, I took it to Jiffy Lube. I was having a busy month, and I didn’t feel like changing the oil myself. They must have used an impact wrench to put the oil plug in, because I had quite a time getting it out. Sometimes dealers and mechanics overtighten things in order to discourage car owners from doing their own maintenance. I don’t know if this is a Jiffy Lube policy.

Thank God, they didn’t use a wrench on the filter. I was able to get it out by hand, and that’s as it should be. If your filter won’t come off without tools, it was installed by an ignoramus or someone who wanted you to bring it back for more work.

My Harley received a free fluid change when it was nearly new. I don’t know what they used to install the filter, but getting it off was a Herculean chore. I have read that they do that intentionally. I had to use my machine tools to modify an oil filter wrench into a tool that works on Harleys. There was no way I was going to splurge for an overpriced Harley tool.

Manufacturers and dealers ought to make things easy to work on, because people remember things like that when they buy new products. It doesn’t do you any good to pressure customers to pay you for products and labor if they hate you so much they start buying from someone else.

I bought 5 quarts of synthetic oil for the Ford, and I figured I would dump the used oil back into the jug. When I tried to do that, the oil overflowed. At some point, American car makers decided to go from 5 quarts of oil to 6 quarts, and no one told me. I had emptied a 5-quart jug into the engine, but 6 quarts came out into the pan. I now have a vehicle which is starting out a fresh oil change one quart low. Oh well.

I was highly responsible when I spilled the oil. I don’t think a few ounces of oil can turn a property into a toxic waste dump, but the oil spilled near my well, and what the hell. I got a shovel, scooped up the oily dirt, and threw it out. Rachel Maddow would be proud.

I don’t drink water from my well, but still.

Tomorrow, I hope to get the ballast box painted. I hope to apply two coats of Kubota orange. The next day, I plan to fill it with sand and pat myself on the back a lot.

I have all sorts of jobs waiting for me in the days ahead.

I ordered a subsoiler to help me remove rocks from my yard, and I have a big rock exposed, ready to yank. I have to do some fence repairs. I have to fix the fuel shutoff solenoid on the Kubota. I need to take the mower deck off the John Deere and see just how badly I damaged the blades when I plucked a canteloupe-sized rock out of the ground with them. I have to loosen the bolts on the golf cart dump bed and move the tailgate to where it should have been in the first place.

As the ballast box picture shows, I still have boxes of stuff from Miami which I have not figured out what to do with.

I am starting to get on top of this place. I’m even using an edger now. It arrived last week. One day the farm may look like it belongs to a responsible person.

If I get that big rock out, I’ll post a photo. I know that will be exciting for everyone.

There’s Always a Hitch

Friday, August 10th, 2018

Engineer Stupid Knows no Bounds

Today’s exciting achievement: I got my Pat’s Easy Change 3-point hitch system installed on my tractor. In order to do that, I had to generate another major achievement: I got my bush hog disconnected from my original 3-point hitch.

I’ll put up some photos of the tractor with the Pat’s kit installed. It’s not clear to me why tractor manufacturers haven’t decided to sell tractors with user-friendly hitches, but I have compensated for Kubota’s strange failure, so I don’t care any more.

The yellow thing is a pry bar I used to line the ends of the hitch up.

The kit consists of two cast spring-loaded claws that trap implement pins and hold onto them. That’s all you really need to pick up a mower or baler or whatever. You still have to attach the PTO shaft and the top link, but you don’t have to beat and kick on the lower arms any more, and you can back your tractor right up to an implement and connect the lower arms without an assistant or a nightmare of adjusting and cursing.

It is astounding that tractor makers went a hundred years without making implements easy to change. The stupidity boggles the mind. A tractor is a torment to use if you can’t change implements easily. One of the great virtues of a tractor is that you can use it for a lot of different things. When it takes an hour to change implements, you’re not going to change them very often, and you’re going to lose a lot of the tractor’s usefulness.

Dealing with this thing put me in a foul mood. I need to pray and decompress. I hate stupid engineering. I really hate it.

The Pat’s invention is wonderful, but I have some complaints. The instructions are on a par with Chinese instructions. The diagrams don’t match the parts, either. You have to sit back and say, “If the person who wrote this had known what he was doing, maybe he would have said THIS…”, and then you try your theories out.

Another gripe: the parts are covered in sticky paint that makes them hard to assemble. Some of the tolerances are tight, which is a sign of quality, but the manufacturer ought to let you know you need to use oil or anti-seize in order to get the kit installed. One user says the heavy pins that go through the clamps will actually seize inside the tractor arms if you don’t do something about the paint.

It should take half an hour to get the kit installed, but I took more like an hour, because I had to do things more than once. The instructions tell you to do things in the wrong order, so you have to take things apart after you’ve put them together.

I don’t care. If the invention works, I can stand the one-time pain of poor instructions. It’s better than dealing with the repeated pain of not being about to remove and attach implements.

I had a great time removing the bush hog from the tractor. In a sane world, this would take no more than one minute. I would guess it took me two hours. The worst part was the PTO shaft. This is the implement’s drive shaft. It’s covered with a shield that prevents you from touching the moving shaft. That would be fine, but the shield is very hard to take off.

In case anyone else out there is having problems taking a Eurocardan shaft cover off an implement, I will clue you in. You lift the tabs on the little black collar. Then you slide it back to expose the end of the big yellow shroud. Then you will see the idiotic giant snap ring that holds the big yellow shroud on.

The snap rings are made so it’s hard to get a tool under them to pry them off. Because who would ever want to do that? Only someone who doesn’t want to use the same implement for the life of his tractor.

You have to put a screwdriver under the ring, lift it up, fight with it, and get it to move toward the implement. This releases the compression on the yellow shroud, and then you can slide it back, exposing the end of the PTO shaft. Then you MIGHT be able to push the spring-loaded button that releases the shaft so you can remove your implement. You MIGHT.

It’s so stupid. There are better designs out there. I’m considering buying a new shaft just to avoid dealing with this one again. Or maybe I should put hose clamps where those Satanic snap rings used to be.

The solution they used in the old days wasn’t too bad. Here it is: stay away from the spinning, uncovered shaft. That worked really well. But then lawyers showed up and ruined it. I’m sure.

Now I have a hitch I can use, probably. I hope. That means I can attach my ballast box and quit hauling that annoying bush hog everywhere. Today when I got the bush hog off, I could not resist going for a joy ride without it. I’m going to love having the ballast box back there. It will be good for the tractor, it will keep the rear wheels down, and it will give me a place to put a chainsaw. Perfect.

Next project? Either a new flail mower or a new set of brush forks. The ones I have are a horror to remove and install, so I can’t use the loader bucket. If I can find a better alternative, I’ll be all over it.

Latest Victory: Flaming Stumps

Tuesday, August 7th, 2018

Finally, a Use for the Leaf Blower

I conquered some small issues on the farm today.

I have been researching stump removal. It looks like the best option, short of paying someone, is potassium nitrate (saltpeter). You pour it on your stump, wait four weeks, and then burn the stump. The saltpeter eats the wood and makes it porous so it will burn quickly.

There are other options which work faster.

I had a few small stumps, and I decided to burn them without using saltpeter first. That meant I had to have something that would keep the fire going. I thought about it, and I figured charcoal would work. I bought some charcoal at Tractor Supply, soaked my stumps with diesel, added charcoal, added more diesel, and lit the charcoal with a torch.

It works. The charcoal keeps the stump hot, and the stump burns. It may not burn like a torch. It may burn more like a cigar. That’s fine. Burning is burning. The only problem is that a stump that hasn’t been treated will not burn all that well, so you may have to use charcoal more than once.

I’ve seen people on the web use steel drums to confine charcoal on top of stumps. I didn’t see the point. It’s not like charcoal is going to get up and walk away.

I realized forced air would make the whole process go much faster. I would like to get a small electric blower to point at burning stumps. I don’t have one, so I did something amusing instead. I took my leaf blower and blew on the stumps. They lit up like the sun. It was really neat.

I’m going to get some saltpeter. They have it at Tractor Supply. I don’t know how to make a dry powder stay on top of a stump in a wet climate. Maybe I’ll have to use tarps or something. Other people do it, so there must be a way.

My other big triumph: I ordered a quick-hitch system.

Tractors use what are known as three-point hitches to connect to implements. The three-point system is ridiculous. It’s proof that no matter how long people have been doing something unpleasant, they may continue doing it stupidly instead of inventing new methods. It’s very hard to get a three-point implement onto or off of a tractor.

One answer is the quick hitch. This is a bulky steel frame that connects to your tractor. It’s a stupid idea. You use your stupid three-point hitch to hook to a frame that uses hooks to connect to implements. The obvious question: why not put the hooks on the three-point hitch to begin with? There is no reason why Kubota and John Deere can’t do that.

The frame will limit the number of implements you can use, because the lower hooks are a fixed distance apart. If your implement isn’t just the right width, you have a problem. Dumb.

Someone came up with an obvious solution. It’s called the Pat’s Easy Change quick hitch. You put two new receiver doodads on your lower arms, and you connect the top link the way you did before you had a quick hitch. Because there is no rigid frame, the width of your implement doesn’t matter.

I have a hay spike, a bush hog, and a ballast box. I’m planning to get a flail mower. I also want a subsoiler. I have to be able to change implements fast. The current system is idiotic. It’s so bad, it makes it seem worth it to have one tractor for each implement. How did we get all the way to a new millennium without confronting the issue? Amazing.

Once the quick hitch is in place, I should be able to move from the bush hog to other implements without too much pain. Then I’ll be able to tear rocks out of my land with a subsoiler. That will be wonderful.

I hate tools I can’t use. Everyone has tools that are so difficult to deal with, they sit and collect dust. If I have to blow a couple of hundred dollars to make my tractor useful, I’m all for it.

I need to liberate my front end loader. I have brush forks on it now, and that’s great for moving limbs and logs, but it makes the bucket useless. I have to find a solution. The forks are very hard to remove. It would be worth it to buy a second bucket or a different type of forks. That’s how bad it is.

If I had the loader working, I could fix up my berm. I could level my cart roads. I could move a lot of dirt. I have to get it functioning.

You wait and see. I’ll get things working the way they should. I’m not going to put up with this crap. Life is too short!

When I get the big rock out of my front yard, I’ll put up a photo. I want you to share my joy.

The rock is going to lose. Watch and see.

The School of Rocks

Monday, August 6th, 2018

This Yard Will Respect Me

Ordinarily, I am not up this late, but today is special. I wiped myself out working in the yard, and I came in after 8 p.m. It took me a while to decompress and stop exuding sweat, and then I had to get cleaned up. I also spent a lot of time Googling, trying to find tools for removing rocks from yards.

I love my farm, but I have no illusions about the soil. It’s sandy, and there are a lot of rocks. The rock is fairly hard limestone, unlike the airy oolite of South Florida. I don’t know how much rock is under my land, but there are some full-blown boulders sitting in my front yard. Bigger than couches, I mean. I assume I would find a few more if I knew where to dig.

When I first got here and tried to mow, sparks shot out from under the mower. I ran over an exposed rock in an unexpected place. The seller did a lot of work on this property, but he left several rocks sticking out of the lawn, and I have a talent for running into them. It’s disturbing watching sparks shoot out from under your deck.

I want to clear the lawn of rocks. I don’t care if there are a few in the woods, but the yard has to be clear of mower obstacles. The huge boulders are fine, because they constitute landscaping. The ones I hate are the smaller ones that peek out and try to bite me.

Today I warmed up for rock removal by attacking a strange piece of wood I’ve scalped with the mower twice. It was sticking up all by itself in a grassy area. I tend to give the previous owner too much credit, so until today, I left the wood alone, figuring that he would have moved it had it been possible.

I backed the Kubota up to the wood, and I slipped the end loop of a tow strap over it. I started pulling, and the wood snapped suddenly. It was now pointing 180 degrees away from its original direction. I thought that meant it was loose, but when I tried to pick it up, it felt like it was anchored to the earth’s core. I can’t figure that out. I hooked it to the tractor and pulled it in the other direction, and it came flying out of the ground. That felt good. I pitched it into the woods and decided to take on one of my rocks.

I didn’t get all of the wood. The piece I took out was part of a live oak root. I don’t care. The rest of it is too deep to bother me.

The rock in question is 30 feet from the porch. The exposed part was the size of a salad plate. For all I knew, it was the tip of an acre-sized boulder. I decided to try digging it up anyway. I got a shovel and dug around it, and what I ended up with was a rock about two feet long and ten inches wide. It’s probably around 20 inches deep. I haven’t gotten it out yet, but I proved that it wasn’t yard-sized. I proved it could be removed.

The rock had roots around it. Annoying. A big one at one end grew over it. I never got anywhere with that one. I got a mattock and cut the rest without a lot of effort. Never, ever try to cut roots with a shovel. A mattock will work. An axe will work. A sawzall will work. A shovel will just bounce off and tire you out.

Once one end of the rock was exposed, I tied the tow strap to it and pulled it with the tractor. I got it to rise a few inches, and it moved about 9 inches to the north. That’s all I got. I believe I drove it under the root that holds it down, so now I’m stuck.

What do I do now?

I have to cut the root. I believe I’m going to use the sawzall. That might loosen the rock to where the tractor will pull it out. If that won’t work, I’m going to get a subsoiler.

A subsoiler is a very strong hook you pull behind a tractor. It cuts a slit a couple of feet deep. If you hit a rock below a certain size, it will hook under the rock. Then you can use your hydraulics to roll it out of the ground. It will also bust roots. It can move stumps if they’re not too big. Sounds like something I need.

It also sounds like a handy device for tearing up water pipes, septic tank pipes, and buried cables of all types. I’ll have to make sure I know where everything is. I know for damn sure there are no cables near that rock, because it’s obvious that no one made any effort to disturb the soil in that area.

Once this rock is loose, I’m going after the rest. They will pay. Believe me. If I can’t tear them out, at least I can use the subsoiler to prove they’re too big to move. Then I can get a sledge or the rotary hammer and shatter the tops of them. I can remove everything that sticks up and put soil over them.

Eventually I should have an assortment of nice landscape boulders. Not sure if I should use them or sell them.

It’s neat to succeed at this stuff, especially when the previous owner could not get it done. I’ve found I can go out after the sun abates, use the right tools, and get a great deal done in a couple of hours. Last year I spent a lot of time working long hours in the heat of the day, wearing disgusting sunblock. That was a mistake. Work shorter hours. Work consistently. Use stuff that gets the job done. Avoid the heat and sun. That’s what makes things happen.

If you need rocks, I am the guy to talk to. I have more than I know what to do with.

Little Lambs Eat Ivy, but They’re Tougher Than I Am

Wednesday, August 1st, 2018

Enjoying Nature’s Thoughtful Gifts

Today I had fun cutting a tree that had collapsed on a fence. Afterward, I realized the area near the tree was carpeted with something which is probably poison ivy. Now I’m sitting around reading everything I can find, trying to figure out how to cope with this weed.

My farm has lots of poison ivy. I didn’t know what it was when I moved here, but at some point, I did some studying, and I found out the little three-leaved plants that occupied so much of my land were the famous toxic vine. Sometimes it appears as small, isolated plants. Sometimes it’s thick, woody vines 70 feet long. Today it was a big area of lush ground cover that actually looked pretty nice.

Most of my poison ivy has fat leaves with multiple points. The plants I saw today had long, oval leaves with pointed ends. They looked very little like the rest of the plants, but that doesn’t mean anything. Poison ivy has an annoying ability to look like different plants. If you see a shiny plant with three-leaf clusters, and the first two leaves in each cluster are directly opposite each other instead of being staggered, you may be looking at poison ivy.

Because the stuff I was wading in today didn’t look like normal poison ivy, I was happy to thrash around in it and put my saw down on it and walk on it for about an hour.

The Internet is full of mythology, but I think I’ve distilled a few facts out of the mess, so here I am to relate them to you.

The poisonous part of the plant is an oil called urushiol. It takes its name from urushi, a lacquer used by Asian woodworkers. There is a tree that secretes urushi. It’s called the kiurushi tree.

Japanese woodworkers coat their work with urushiol, and then they let it cure for months. Once it cures, it’s harmless. They wear gloves and long sleeves when they handle the uncured oil.

In poison ivy, urushiol is found inside the leaves and vines. You can’t get a rash just from touching a leaf. Maybe that’s not true for people with crazy sensitivity, but it’s generally true. To hurt you, a leaf has to be damaged.

Once the oil is out of the leaf and it gets on something, it can remain poisonous for 5 years. That means you can get it from sharpening a lawnmower blade or resting your hand on a tractor tire. That’s bad. How many people know exactly what their tractors have run over? I’m sure I’ve run over poison ivy. I wonder how tractor mechanics keep themselves safe.

If you get urushiol on yourself, it will only cause a rash on the areas it touches, and it has to stay in contact with your skin for a minimum amount of time in order to cause a reaction. If you remove the oil from your skin right after you get the oil on you, you will not get a rash. Unfortunately, you won’t know if you’re in the clear until days later, because poison ivy can take days to develop.

To get urushiol off of your skin, you have to use soap or detergent and friction. You can’t just run water over yourself.

Experts say people get less sensitive to urushiol with age. They also say you get more sensitive with successive exposures. They don’t seem troubled by the obvious contradiction.

Here’s a bummer for you: the mango tree is related to poison ivy. It does not produce urushiol. It produces a similar chemical called resorcinol. This chemical is found in the leaves, sap, and rind. If you’re allergic to poison ivy, you are probably allergic to mango sap, and vice-versa.

I have worked on this farm for almost a year, and while I have been burned, bruised, scratched, and bitten, I have never had a poison ivy rash. This is true even though I didn’t know what I was walking through (and on) until long after I got here. Now questions arise.

Am I immune, and if so, will it last, or will it go away? This is the question that interests me most. Some people never get a rash. On the other hand, some people start out insensitive and then break out in oozing blisters. I want to be in the first group. If I’m not, how can I protect myself? I have a mower and a tractor. God knows what’s on them, and they’re not that easy to clean.

If I’m immune, what about other people who visit the farm? Will I put them in the hospital by letting them use my tools? That would be awkward, wouldn’t it? And what if I take my tractors to the shop? Do I warn them, or will they think I’m nuts?

Doctors claim you can’t make yourself immune to poison ivy. They say you can only make yourself more sensitive. Okay, but I have seen claims that people who have been exposed to mangoes a lot can become insensitive to poison ivy. Supposedly, Hawaiians, who eat mangoes, are insensitive to mango oil, which would mean they were also insensitive to poison ivy.

I’ve been around mangoes for decades. Miami is buried in them every year. They’re a plague. I’ve handled tons of them. I’ve sliced them up. I’ve gotten the sap all over me. I’ve never had a reaction, which is good, because some people in Miami can’t go out in their yards without blowing up. Is it possible the mangoes got me ready for poison ivy?

Am I immune? If so, am I immune because of mangoes? If that’s not it, am I just temporarily immune because I haven’t been around poison ivy enough? Do I have to worry that one day I’ll swell up after touching my boots, which have definitely stomped on a fair amount of poison ivy?

What if I’m sensitive to poison ivy but I’ve been incredibly lucky all year? Maybe I just happened to avoid touching every contaminated surface, consistently.

I don’t know the answers.

I have considered taking a poison ivy leaf and applying it to a tiny area of my skin, in an area where a rash wouldn’t drive me crazy. This would be my DIY patch test, to see if I react. But what if it merely made me more sensitive? What if I’m immune now but my little experiment ruined it for me?

My prediction: nothing will happen to me after today’s exposure. I got in the shower when I got home, and I used my usual toxic castile soap to scrub myself, so if I got any oil on me, it’s gone, along with all of my skin’s natural oil. Also, I wore long pants and leather gloves today. I do feel a little regretful about using the finger of one glove to scratch my eyelid, but I think I’m in the clear. There has to be urushiol on my boots, but that’s always true, and nothing has ever happened to me.

After I realized I was probably in poison ivy, I drove back to the house and got the super-duper Roundup. Most people don’t realize Roundup comes in two varieties: the super-duper kind, and the kind that doesn’t work. The regular kind is useless except for accidentally killing your lawn. The super-duper kind actually kills weeds, and it even mentions poison ivy on the label. I blasted the daylights out of the area where I had been using the chainsaw earlier. I hope it works. I just need a few more dry hours to let it soak in.

It would be nice if being exposed to mango sap all my life left me with some protection from poison ivy. I would like to think I got one positive thing from my horrible relationship with Miami.

Still Flailing

Friday, July 27th, 2018

Weeds Closing In

I am considering getting a flail mower.

The farm is getting weedy and overgrown. Apparently the cattle that used to live here did a good job consuming vines and bushes. Now that they’re gone, I need a solution.

I was thinking about goats and sheep. I still am. Everyone says goats will get the job done. I have read that Katahdin sheep will do the job even better, without the goat behavioral issues, and they don’t mind the heat. They raise them in the Caribbean, so Ocala will not be a problem. They don’t produce wool. They’re among the breeds known as “hair sheep,” which means they don’t have to be sheared.

A friend of mine says she talked to a lady who has raised goats for 30 years. The lady said goats won’t eat weeds. What? Google “goats” and “weeds” and see what comes up. Cities are paying four figures each to rent goats to clear lots of weeds. How can people have different opinions about goats and their appetite for weeds in 2018? Hasn’t the human race had enough experience with goats to figure out the truth?

My best guess, based on the gigantic amount of material claiming goats eat weeds is this: goats eat weeds. But if that’s true, why would a lady who raises them disagree?

I read that you’re not supposed to give goats grain. Supposedly it makes them ill if you give them a lot of it. I wonder if this lady has spoiled hers with goat feed.

If I get ruminants, I have to get a donkey. We have coyotes, and donkeys hate them. Coyotes may be brave enough to mess with sheep, but donkeys scare the bejeezus out of them. They chase them around, and they have been known to grab them and throw them. I would pay to see that. I wonder if I could teach one to throw coons and squirrels. Maybe I could set up a target.

If I do all this, I have to think about water, fencing, veterinary expenses, and God knows what else. But they’ll do the work for me, and they’ll probably do it better than machinery. They can go places machines can’t.

How many animals would I need? That’s a good question. I was hoping I could get away with maybe three goats or sheep, but this is a fairly large property. I don’t know how much they eat.

I have a bush hog, which is basically a 6-foot-wide lawnmower. It will take down grass, bushes, and little trees, but it’s sloppy and it’s not easy to maneuver.

Someone suggested flail mowers to me. I had no idea what they were. The reason I didn’t know is that they are new to America. They are popular overseas. A flail mower has a rotating horizontal cylinder on it, and the cylinder is covered with hinged knives. The swing into the vegetation and pulverize it. It’s hard to describe it, but you can Google and see pictures.

A flail mower sits right behind a tractor’s rear wheels. It’s compact, so it’s not hard to make it go where you want. It will clobber branches better than a bush hog. It cuts things in small pieces that fall straight down, while a bush hog sort of throws things into an undesirable row.

You can use a flail mower to do all the things a bush hog does, and it will also mow grass. You can cut your yard down to an inch if you want, and it will look like you did it with a real lawnmower. A bush hog is useless for finish work.

If I get this thing, I should be able to sell the bush hog and make space in the workshop. The bush hog is old and grimy, so it doesn’t matter if I leave it outside, but it would be nice to be rid of it if I don’t need it.

It’s tough trying to keep a farm under control when you grew up in the suburbs. I’ve spent a lot of time on farms, but they belonged to my grandfather, and he had cattle to keep the grass cut. I don’t have anyone to advise me except for Internet forum people.

Animals would provide poop, and they would generally do a better job than a machine, but they are a bigger responsibility, and if they decided there were things they didn’t want to eat, I would still have to cut those things myself.

I’m trying to make myself accept something: the people who used to live here didn’t do a great job. They chose plants badly. They left a lot of trees that need to come down. They didn’t choose the best machines. They kept it neat, but I need to make this place my own and quit trying to restore their strange plan. I need to get better plants and better tools, and I need to start killing annoying things the sellers left here.

I feel like I should seriously consider a donkey plus some sort of animal to keep it company, regardless of what I do. Any animal that injures or kills coyotes is a treasure.

You, Robot

Tuesday, July 10th, 2018

Meet the New Upstairs Maid

A few months ago, I bought a Roomba. The house I now live in has a built-in vacuum system, which is impressive, but there are problems with it. First of all, I am lazy, and the central system will not run by itself. Second, the system has a 30-foot hose which is not much fun to carry upstairs and from room to room. It’s actually easier to carry a vacuum cleaner, now that I think about it.

The big advantage of a built-in vacuum system is not convenience. Not unless you have several expensive hoses so you can leave one in every room. The advantage is cleanliness. A central vacuum does not expel dust into the air like a regular vacuum. Everything it takes in goes out of the house and into the remote canister. That’s nice, because nothing gets blown back into the air, and you never have to buy bags.

The Roomba is great, with certain reservations. It runs every day, and it usually gets stuck at least once. It thinks area rugs with patterns are “cliffs.” It sends me messages saying it’s trapped on a cliff and makes me go pick it up. I’m positive it’s female. So needy. It even sends me messages when I’m out of town. I don’t know how it does that. I never gave it my number. “I’m stuck on a cliff, and you’re out gallivanting around without a care in the world.”

I spend a lot of time picking the Roomba up, moving it eighteen inches, and turning it back on. “There, there. You’re safe. And you don’t look fat.” But it’s worth it. It beats doing the entire job of vacuuming with my own two hands.

The Roomba can’t climb stairs. As far as I know. This is its biggest flaw. As a result, I was forced to buy a second vacuum. A Eufy. Reviewers liked it better than the Roomba, and it’s cheaper. It has no phone capabilities. After dealing with the Roomba’s constant cries for attention, I viewed this as a plus.

The Eufy is running right now. It has two side brushes, and the Roomba has only one.

Uh oh. I just heard a crunchy sound.

It was nibbling on an adaptor cord. No harm done. When I got up to save it, I started moving things around and clearing the floor. I didn’t realize how messy the room was until I turned the Eufy on. It is training me to be neat.

The machine has been running for about 10 minutes, and I have had to get up twice. The first time, it was in my bedroom, making a distress beep. It had sucked up the little wire antenna from my clock radio, and it had used it to pull the radio under the bed. I got there before it did whatever nefarious deed it was trying to conceal.

This house has two staircases. I was worried that the Eufy would fall down the stairs as soon as I turned it on, but I have watched it back away from the stairs already, and it seems to have some sense of self-preservation.

Another nice thing about the Eufy: it doesn’t have to ram into the wall in order to know it’s time to turn around. It senses walls from a few inches away. This should make it easier on baseboards and furniture.

Months ago, I knew the Roomba might damage the paint on my baseboards, but I pictured myself sweating over a real vacuum cleaner, like a peasant, and I decided I didn’t care. Paint is cheap.

I like this machine. It’s lower than the Roomba, so it doesn’t hit as many things. It’s very quiet, too. I hope it works out.

I’m a dusty guy. I don’t like to vacuum, and I tend to create clutter, so dust is one of my curses. The Roomba has sucked up all sorts of dust downstairs over the last few months. If the Eufy does the same thing up here, dust will no longer be a problem.

It’s quiet. What happened? Just a minute.

It was in my bedroom again, at the other end of the house. Maybe going after the clock radio again. VENDETTA!

Here’s a photo of the Eufy, shortly after I launched it on its maiden voyage. It has a glass top, so it probably won’t get scratched up like the Roomba. Or maybe it will. I don’t know.

I’m stuck here writing about vacuum cleaners because it’s too hot to move. Outside, I mean. The fricking daily rain turns this area into a steam bath. Today we had blazing sun and almost no clouds, but I promise you, it will be raining shortly. I don’t even have to look.

Another fun purchase: I’m getting a ballast box for my tractor. Not the little tractor. The big one. My tractor came with a bush hog attached, and people advised me to leave it on. They said the weight would be helpful when I lifted stuff with the front end loader. That’s true, but it also makes banging noises, and it digs trenches in the dirt when I turn. I need some other form of weight.

You can buy weights made for tractors. You can get steel weights that go on the front, and you can get giant steel disks that mount on the rear wheel hubs. I don’t need weight up front, obviously, and the wheel hub weights look like a bad move.

When you lift stuff with a front end loader (or “FEL,” as we tractor experts call them), you turn your tractor into a seesaw. The fulcrum is the front wheels. You can actually lift the rear wheels off the ground if you lift too much with the FEL. Supposedly, this is bad. You want to reduce the weight on the front tires because the front end of a tractor is wimpy. Stressing the front suspension repeatedly leads to problems and repairs.

If you put a big weight behind the rear wheels, you create a lifting force on the front wheels. Think about it. Wheel weights can’t do that. They put weight on the wheels themselves, so there is no helpful new seesaw effect with the rear wheels as the fulcrum.

A ballast box is a big steel box you fill with heavy stuff. You mount it on your three-point hitch, behind the rear wheels. It improves your rear wheel traction and takes weight off the front axle. I need one.

You can fill them with concrete or rocks. I decided to use sand. The upper area of a ballast box is a good place to put things like chainsaws. If I use sand, I’ll have a nice soft bed for my tools. I’ll have to keep sand out of them, but it will be better than bouncing on concrete. Also, I can drain sand out if I want to. Some day I may want to transport my ballast box. It weighs 132 pounds empty and about 982 full. You can see why I might want to dump the sand. Can’t dump concrete.

I tried to remove the bush hog once. It did not cooperate. But I know it’s possible. The whole purpose of a three-point hitch is to allow you to change implements, so there has to be a way to get my bush hog loose.

I didn’t want to remove it, because I knew I would have to leave it out in the weather. Having looked at it carefully, I know realize this is a stupid concern. The paint is in bad shape. It has clearly seen plenty of rain in its day. I don’t think it will hurt it to sit outside.

The tractor stays indoors. Unlike the bush hog, it looks great.

In a few days I’ll have a ballast box, and then I can run to Home Depot for 16 bags of sand. I have sand on my farm, but it’s full of bugs and poop. I want nice sand, not a fire ant farm full of gopher droppings.

I haven’t seen the Eufy in a while. Hang on.

Bedroom. It found a flashlight on the floor and tried to eat the lanyard. Then it turned itself off out of spite.

Still better than doing the work myself.

Once I manage to get the ballast box working, I plan to start using a harrow to drag my yard. I have lots of crap stuck in the grass. Spanish moss and live oak leaves, mainly. I can’t take it any more. It has to go. I think a harrow is the only thing that will get it loose. I can’t use one with the bush hog attached. I can get one for the garden tractor, but it would be small and therefore inferior.

Maybe I’m wrong. A small harrow would get into more places.

If I can get used to swapping implements, I can get a box blade and really get stuff done. I could level roads, which would be nice.

I can hear the Eufy. Things must be okay.

I keep getting more things done than I used to. God is freeing me from restraints. Supernatural stuff is going on. God keeps showing me that the things I thought he was telling me really did come from him.

It’s a relief. It means life will continue to improve, not just while I’m here on earth, but after I die.

People don’t believe what I say. That’s unfortunate, because it would help them. Pride in doctrine is a major stronghold.

The Eufy is back! Oh, no. It found a USB cord. But it escaped!

I should get another one of these things. Maybe they get lonely.

The second story of this house is probably 2500 square feet, and the Eufy is killing it. I think I’ve found my dream wife.

If I ever get the ballast box working, I’ll blog it. I can’t wait to use the tractor without having to hear the bush hog bouncing up and down.

Groot Expectations

Monday, July 2nd, 2018

3D Printing Almost a Reality

This week’s exciting development: I am now a big 3D printing expert. And my opinion of the whole enterprise is even more negative than it used to me.

I want to be good at CAD. It’s useful for CNC machining. It’s useful, period. You don’t need CNC in order to have uses for CAD. You can design stuff with CAD and build it with files and grinders if you want.

CAD is good. Printers use files that come from CAD. Printing will make me better at CAD.

I also want to be able to print a useful part from time to time. Most things that come out of 3D printers are unbelievable useless crap, but you can also design metal parts in CAD, print them in plastic, and see if your design makes you happy before committing. You can use printing as a step in designing metal parts, but plastic is strong enough for some parts, so you can also print certain things which you can use.

I ordered an Anet A6 printer. This is the upgraded version of the Anet A8. Right away, you can see that the 3D printing collective has issues. Why would an upgraded version of something have a lower model number? And what is Anet going to call the printer that comes after the A0? The -A1?

The A6 arrived last week, and I started assembling it on Sunday. They send you a box containing stacked styrofoam trays full of parts, and you get to put them together. There are no written instructions. You get a USB drive with a PDF file. I think the drive may actually be a micro SD card in a USB adaptor, but it’s in a USB port right now, so I don’t want to take it out and check.

The instructions aren’t perfect, but there are very good Youtube videos.

I would say I have another two hours of assembly to go. It’s about a 5-hour job. Am I complaining? Yes. Well, no. If the printer came assembled, it would cost a lot more.

I’ll put up a couple of photos. One is the printer by itself, with the print bed installed upside down. I’ll fix that. The other is my assistant, Johnathan. He lives in one of my storage closets. He gets fed as long as he continues performing menial tasks for me.

Actually, he belongs to my friend Amanda. He is her youngest son. He likes building things from Legos. Working on a 3D printer is a step up for him.

I spelled his name right, so don’t correct me in the comments.

Notice how well the new workbench is serving me. It’s a joy to use.

The printer’s frame is made from black acrylic. They cut it into useful shapes with a laser or something. Maybe I should have bought a laser instead of a printer.

The sheets arrive covered with paper decals. The acrylic is manufactured with a big protective decal layer on each side. You have to peel it off every part. This is why the printer takes 5 hours to assemble instead of three.

I may get the printer running today. In anticipation, I’ve been looking at videos. The news is not all good.

The first thing that surprised me is this: it takes forever to print things. I’ll post a video in which someone prints–get ready for this–a giant orange Baby Groot. Dolls are very big among male scifi/comics fans. Troubling. Anyway, the Groot has two parts, and each part took around 5 hours to print.

Will the things I make take that long? Not for the most part. I expect to print a lot of small items. Still, 5 hours! Man! What if I need to print something big, and I have to make several versions to get it right?

I’ve also learned that printing is not precise. I’m not sure what kind of tolerances you can expect. From looking at things on the web, I get the idea that you would be lucky to stay within 5 thousandths of whatever it is you’re trying to print. That may not sound bad, but it is. Imagine you’re printing a knob to go on a 1/4″ shaft, and it’s supposed to rely on friction. If it’s 5 thousandths too big, it will slip, and if it’s 5 thousandths too small, it won’t go on the shaft.

Based on what I’ve seen so far, I expect to find myself using drill bits and sandpaper a lot.

I may have a way to mitigate the time problem. I’ve noticed that people tend to print solid objects. By “solid” I mean “not hollow.” They’re filling their prints with plastic that doesn’t do anything but add weight. It’s stupid. I’m wondering if I can create designs with a lot of hollow space to avoid wasting time and filament.

Here’s another bummer: prints fail a lot. You can set up a job that takes three days to print and have it go crazy late on the second day. After that, the printer will keep wasting filament on a doomed print while you’re off somewhere looking forward to handling the finished item.

A web printing guru says the smart thing is to rig a camera up so it sends you video of the printing process. Then you can shut it down when it goes sour.

I sort of hope printing hobbyists don’t see this, but here goes: I am very disappointed in them. It looks like all most of them do is turn machines on and print other people’s designs. I saw an instructional video today, and the guy in the video had a lot of ridiculous garbage on the shelves behind him. How many skulls and unicorns does a grown man need? What is that junk good for?

It’s like painting by numbers, which, I should stress, is a perfectly legitimate hobby. If it makes you happy to print Thanos heads all day, go for it, but you’re not really learning anything. You’re also filling your living space with things that will motivate people to apply unkind labels to you.

Here’s what I wonder: who is creating the designs people use? I have CAD, but there is no way on earth I could create a Groot doll. CAD uses lines and simple curves. Can you imagine how many tiny lines and curves are in a Groot doll? Someone must be sculpting these things by hand and then scanning them into CAD programs. I don’t know how it’s done, but your 12-year-old 3D-printing nephew isn’t designing plastic skulls by himself. If this is true, then what are most printer owners really accomplishing?

It looks like there are people who use printers as tools, and there are other people who don’t learn anything from 3D printing except how to assemble rickety machines and make them function.

Home 3D printing technology is still in its wobbly infancy. That’s what I take away from all this. The machinery has huge limitations, and part quality is not great. It will be a fun, cheap way to improve my CAD and Gcode knowledge, and I’ll get some useful things printed, but 3D printing is closer to the realm of Ron Popeil than that of Haas Automation.

Taking the 3D Plunge

Tuesday, June 26th, 2018

Now I Need a Puffy Shirt and Some Goth Tattoos

Temptation got me. I am buying a 3D printer.

This was not an easy decision. I was waiting for printers to become a) affordable and b) useful. I would say I’m 75% of the way there. You can get a fairly decent printer for a little over $200 now, so a) is covered, and the printed parts are useful for certain purposes as long as you don’t push it. That covers b) to the tune of what I reckon to be about 50%.

When 3-D printers came out, they were very pricey. They still are, if you get one that even approaches fulfilling the 3D printer mission. If you want multiple colors, limited glitches, strong parts, large parts, and so on, you pay through the nose. If you’re content to make reasonably good stuff in single colors, with a tolerable level of aggravation, you can get a lot done for a a low three-figure sum.

Why do I want a 3D printer? To print illegal guns, of course. I want to print up a warehouse full of flimsy, dangerous, non-rifled pistols and stick it to the Deep State.

That was my little shout-out to you, DHS people.

I actually want it to improve my CAD skills, prototype stuff I am considering making with machine tools, and make whatever useful printed items are within the limits of the technology. Printed guns are not for me. They are the gas station sushi of guns.

If you truly want to print good stuff, you can now buy 3D printers that do metal. Last time I looked, they started at about $800,000. That’s a little steep; I plan to wait just a little bit longer.

I’m not sure how such a machine can make sense, when you could have astounding casting and CNC capabilities for maybe $100K. You can get a HAAS CNC mill up and running for under $30K.

I never got anywhere with CNC. I did a few things with CAD, but when you’re machining things by hand, CAD is not that tempting. It’s usually easier to just go to the garage and throw metal on the machine, relying on a sketch on a legal pad.

I learned that Fusion 360, the free CAD from AutoCAD, will create designs a printer can use. Now I’ll have a little motivation to use Fusion 360. I won’t be able to make anything unless I have a computer file on hand, so CAD will be mandatory.

At first, I considered getting a $300 Monoprice printer, but I read some bad things about them. I ended up choosing something called an Anet A6. It’s an open source gadget. You buy a kit and put it together. I’m sure manufacturer support is terrible, but the web is full of nerds who use this machine and similar machines, so you can always go to a forum and get advice, if you don’t mind fielding a few snotty remarks from 4chan-dwelling pimple-poppers.

Wow. I just described about 30% of the world’s tech hobby forums.

My understanding is that the vast majority of printer users make useless things like plastic skulls and dolls action figures. I suppose they get excited about the novelty of printing, and they crank out a few items using other people’s designs. Then they get bored and let the printers gather dust. I’m hoping I’ll find uses for my printer. If not, there is always Goodwill.

I don’t want a skull. I don’t understand why printer owners like them so much.

I looked online for useful designs, and I really didn’t find any. One guy made a bottle opener. American homes contain a lot of stuff that has plastic parts that break, though, so I should be able to come up with projects from time to time, even if I can’t invent anything.

I think it’s going to be a long time before 3D printing really works. It seems like the problems printers had three years ago are the same problems they have today. Weak parts. Inaccurate parts. Parts that are too small.

I’ve read that it’s possible to print with nylon. This is a very strong material. I’m wondering if I’ll be able to do it. The obvious question is this: “If it works, why isn’t everyone doing it?” There have to be some issues with the process, or no one would be using relatively crappy products like ABS plastic.

I ordered something called PETG, I think. It’s supposed to be better than ABS. I picked blue. I figured it was a good choice for most parts. Red would be annoying after you made 40 or 50 things with it. Blue has more dignity.

If I create anything useful or even recognizable, I will be back to tell the world. Don’t expect any skulls, though.

The Difficulty of Simple Choices

Monday, June 18th, 2018

Grace is the Key

When you’re a tool person (or a “tool queer,” as Youtube machinist Keith Fenner puts it), life is never simple. Every time you try to add to your collection, you learn there is more to it than walking into Home Depot and reaching for a box. A huge percentage of the tools sold in the US are so bad, anyone who buys them will have regrets. You really have to look around.

Case in point: hooks and picks. Everyone needs a few hooks and picks. When you work with small objects, you need to be able to get into them with tools smaller than your fingers, and hooks and picks are what you use.

Simple, right? A hook is like a skinny screwdriver with a hooky bit at the end. A pick is a skinny screwdriver with a bent pointed bit at the end. A monkey could make them. You would think.

I found out that most sets either come out of the handles when you put pressure on them, or they bend. Who wants to deal with that? That’s pathetic. Even the crappiest screwdrivers will generally work fine for a decade, so it’s not that terrible if you buy them, but who wants a tool that bites the dust and puts your project on hold the first time you use it?

I’m really mad now. I will think of my happy place.

Oh, wait. I’m sitting in my happy place. I’ll just look around.

I’m about to get mad again, because I’m going to tell you who makes the pick set everyone loves the most. Snap-On. Of course. Everyone says their set is magnificent. A typical set–even American–is under $15. Guess what Snap-On charges.

Wrong. They charge over $50.

You’re mad, right?

I’m not paying $50 for four pieces of bent wire.

A company called Ullman supposedly makes good picks, but–and you won’t believe this–they thread them into their handles. If you apply pressure in the wrong direction, the picks come loose. Come on. What were they thinking?

An American company called Pratt & Reed makes picks that look okay.

I decided to give Grace a shot. This is the outfit that makes the gunsmithing screwdrivers everyone likes. They use good steel in their screwdrivers. They use square wooden handles that don’t roll and are easy to turn. Their picks and hooks appear to be exactly like their screwdrivers. They cost about $20, which is a lot for picks and hooks, but you get 7 tools. Most sets only have 4 tools.

We’ll see what happens. If they stink, I’ll throw them out in the pasture.

Now I’ll look even more cool when I work on guns, because I’ll have Grace screwdrivers plus a set of Grace picks and hooks that match.

If you decide you need your own set, and you don’t trust my judgment (unthinkable), read reviews, because a lot of otherwise-okay companies get serious complaints. I like Gearwrench wrenches, but their picks draw a lot of whining.

Picks are the sort of thing that set tool people apart from doofuses. Everyone knows about hammers and pliers, but there are certain important tools most people don’t seem to be aware of. Fish tapes. Punches. Timberjacks. There are a lot of tools you need, just to make other tools work the way they’re supposed to. I come from a long line of doofuses, so I’m doing the best I can to recover.

I think I’m doing okay. I have two oscilloscopes and four routers.

In other news, I’m getting a six-foot-long table to match my workbench. I already know it will fit in the room, because I’m using a cheap table which occupies the space it will take. It will be nice to have, because it will fill the corner my bench won’t fit into, and the height is an exact match. I’ll have an L-shaped work area that takes up the whole corner instead of leaving me with an awkward empty space I can’t really get to.

I may also get a gooseneck LED lamp and attach it to my pegboard. I can get a 24″ IKEA gooseneck job with a flat base, and I can take it off the base and attach it to a clamp. Then when I need it, I can put it anywhere I want on the shelf at the top of the pegboard.

Right now, lighting is a problem. I have an LED strip over the bench, but obviously, it’s on the other side of the work, relative to me, so it’s illuminating the wrong side of everything. I need a light that comes from my side.

It’s not easy being a mad scientist. You never have enough stuff, and it’s impossible to find a good hunchback.

Noble Savages

Sunday, June 17th, 2018

I am Triggered

I have sort of sad news RE the Savage Accutrigger project. I bought two light trigger springs for two rifles. One of the springs installed pretty easily and worked perfectly. The other one didn’t work.

The gun that works with the new spring is a Savage A22 in .22 Long Rifle. The new spring dropped right in without alteration. It was very soft, so I had to set the trigger pull somewhere above the lightest level. The trigger is great now.

The gun that doesn’t like the new springs is a Savage 93R17 in .17HMR.

This is a different sort of gun. The A22 is a semiauto, and the 93R17 is a bolt action. The Accutrigger assemblies are somewhat different.

When I got the 93R17 open, I saw that the spring was harder to get out. The spring in the A22 had a pin at one end that lodged in the trigger assembly housing. I lifted that pin out and screwed the spring out of the threaded hole at the other end. The 93R17 didn’t have a hole for a pin. The entire bottom end of the spring went over a pin in the trigger assembly. I guess that pin is about 3/16″ in diameter. There isn’t enough room to lift the spring off the pin and pull it out, so you have to remove the trigger and lower the trigger away from the pin to free the spring.

Another problem: the spring I ordered wouldn’t accept the pin on the trigger assembly. In order to create the pin at the end of the spring, the manufacturer bent the spring wire across the bottom of the spring and then bent a small bit outward at 90 degrees. The part that went across the bottom blocked the large pin on the assembly. I had to Dremel it off.

I got the new spring installed and put the trigger assembly together. It wouldn’t fire. The new spring was so soft, it was almost completely compressed by the pressure of the rear of the trigger.

Another customer claims the spring worked with a Savage .17 HMR. Maybe he has the semiauto version. Anyway, I got nowhere.

I decided to modify the original 93R17 spring. I was nervous about doing it, because I had read that Savage didn’t like mailing new springs to people. I pictured myself having to pay a gunsmith a hundred bucks to put a $5 spring in. I found out people had been able to get new springs from a company on the web (Sharp Shooters’ Supplies), so I decided to take a chance.

I wasn’t sure about what I was doing. Some guy on Youtube claims you shouldn’t shorten the spring because it causes other problems. There’s a video of a man taking a different route. He ground down the part of the trigger the spring sits on. He reduced it by about 0.070″. This allows the spring to relax a little.

I considered trying his solution, but I hate hacking up a gun like that.

I found a thread at Rimfire Central, the site that banned me for no discernible reason. A whole bunch of people said they had cut their old 93R17 springs with no ill effects. Supposedly, you can take an entire coil (360 degrees) off the spring. If you take off much more, you can end up with a gun that won’t fire.

The thread was very long, and a ton of people said the modification worked, so I decided to ignore the Youtube advice.

I took my old spring and mounted it in my new Panavise. That was exciting. By my standards. I took down the old Dremel I opened up and got working the other day (another triumph). I used a cutoff wheel to remove one coil from the spring, and I put it back in the gun.

It works fine. It feels just like it used to, except the pull is lighter.

Using the new workbench is a blast. I have air conditioning. I have a big screen TV. I am within easy reach of a couch and a recliner. It’s heaven.

The people on the thread suggested adding Loctite to increase friction in the threaded cavity the spring sits in, to keep the spring from turning and changing the trigger pull all by itself. I did that. I hope it will still turn when I want it to.

I contacted the outfit that sold me the spring that didn’t work, to find out if I had done something wrong. I guess they’ll email me.

Now I have two super-duper scoped rimfires. All I need is some decent weather to try them out.

I keep getting failures to fire with the A22 and Remington Golden Bullets. Not sure what that’s all about. I have a new batch, but I’m still shooting old ones. I haven’t sat down and had a real session with it since I modified the spring, but I did go out and shoot 5 rounds in the yard to make sure it worked. One of the rounds didn’t go off.

I’m not worried. If there’s a firing pin issue or something, it can be fixed. If I have to take the gun to an authorized Savage smith, I can always put the old spring back in so they don’t give me any noise about the warranty. The spring has nothing to do with the firing pin.

Maybe the A22 will work fine with my newest shipment of Golden Bullets. If so, everything is fine.

I like accurate rifles. You can’t learn to shoot with a rifle that shoots worse than you do. You end up chasing the rifle’s errors. As far as I know, I have three very accurate guns now. Not sure; I think the .204 Ruger is accurate, but I haven’t shot it enough to be certain.

I hope to get outside tomorrow and try the modified Savages out.

Call me “Accu-Dude-Bro”

Saturday, June 16th, 2018

New Trigger Spring for the Savage

I think I now have the world’s most dangerous .22 rifle. From the perspective of squirrels. I have also had an extremely satisfying session with the new workbench. Putting this thing together was a stroke of genius. Which I failed to have until I was really old, unfortunately.

I started out with a Remington Nylon 66. I could not put a scope on it, so I looked for something new. People recommended the Ruger 10/22 and the Marlin 60. They said the Ruger 10/22 was a very accurate gun…once you gave your life savings to a gunsmith to make it work. Uh…no. If I want to spend way too much on a .22, I’ll get a CZ 512 or Browning, not an entry-level rifle which is a small step up from a BB gun. I bought a Marlin 60.

The first 60 I got literally would not hit a soda can at 100 feet, so I sent it back to the factory, and they sent me a new one which shot pretty well. Then I found out how hard it was to attach sling studs to it. I also found out how hard it was to get a trigger that worked. The guy who sells the best trigger, which he calls the “KAT,” did not answer email inquiries or social media messages, so I bought the second-best trigger, an M*Carbo, and installed it myself. I also added an M*Carbo recoil spring, because the Marlin 60 is too fragile to shoot hypervelocity rounds with the factory spring.

Finally, I had an okay rifle, but it still didn’t make me all that happy. Because of Marlin’s firing pin design, it could not be dry-fired without damage. With the new recoil spring, it was SUPPOSEDLY able to stand up to powerful .22 rounds like CCI Stingers, but I didn’t trust it.

I bought a Savage A22. It can be dry fired all day without damage. It comes with sling studs. It can be disassembled in about 10 seconds with one hex key. It has a real milled receiver. The Marlin has no receiver. It has two sheets of pot metal bridged by removable pins. The A22 has a Savage barrel, obviously, and Savage makes barrels that are accurate when you buy them, not just after you pay a gunsmith to finish the job the manufacturer should have done. It was also pre-drilled for scope mounts, and it had real iron sights, not the cheap sheet metal flap that comes with a Marlin.

The Savage, which was only slightly more expensive than the Marlin, had an adjustable Savage Accutrigger. This is a wonderful adjustable trigger that sets Savage apart. You can adjust it in the field with a tiny wrench, lowering or raising the trigger pull weight to suit you.

I shot the Savage, and I found that it was accurate. I had failures to fire, but I was using highly questionable Obama-era Remington Golden Bullets, so I wasn’t disturbed by that.

Problem: I had been under the impression that the Savage’s trigger could be taken down to 2 pounds, which sounded very nice to me. In practice, I found that it was fairly stiff even when I adjusted it as far as it would go.

Solution: a company called Gun Shack sells a special spring for the Accutrigger. Apparently, Savage makes at least two springs. One is a somewhat stiff spring that comes with certain models, and the other is a lighter “varmint” spring, for varmint rifles. The springs are interchangeable.

You know I had to have that.

I got myself two springs, because I have two Accu-trigger rifles.

Today I put the new spring in the A22. It was very easy. Well…it should have been easy. I had no instructions, so I wasted some time taking out and replacing the wrong spring.

In case you’re Googling “A22 Accutrigger spring replacement,” let me tell you what to do. I am too lazy to take pictures, but this is really easy.

Take your gun out of the stock. You will need to engage the safety, because it gets in the way when you try to pull the gun out.

Remove the trigger assembly (a plastic box) from the gun. You have to drive out one pin at the rear in order to do this. Your manual has a picture. Make sure the gun isn’t cocked, because the pin won’t move if it’s cocked.

See the fat spring at the very rear of the trigger assembly? That’s your trigger spring.

Insert your trigger adjustment tool and tighten the spring all the way. Your spring is like a screw. It sits in a threaded hole. You have to screw it up out of the hole so it comes loose. That’s why you tighten it. Once that’s done, you can pull it out with tweezers.

There is a little wire pin sticking up from the top of the spring. It rests in a hole in the trigger assembly housing. It acts as an axle. When you turn the spring with the adjustment tool, it turns on this pin. Once you have the spring unscrewed and released from its threaded hole, you can pull the pin out of the hole in the trigger housing and take the spring out of the gun.

To install your new spring, which is lighter and easier to work with, just do everything in reverse. Get the lower end of the spring into the threaded hole and screw it in as far as you can with the adjustment tool. Then you can take tweezers and fit the spring’s pin into the trigger assembly housing hole.

You’re done. Adjust the spring and give yourself the trigger pull weight you want.

I finished working on my gun a few minutes ago, and man, is that trigger easy to pull. I could not get the original trigger spring to give me a weight I liked, but the new spring is so light, I had to back it off from the lowest setting. You can give yourself a bona fide hair trigger with the varmint spring, and if you do that, you might have problems with the gun going off before you want it to.

This is sweet. I look forward to taking it out in the pasture to see what it will do.

I’m also going to fix my 93R in .17 HMR. It’s already extremely accurate, but a lighter trigger pull will surely improve it.

It is said that gun companies make trigger pulls heavier than they have to be in order to avoid getting sued when unskilled people shoot themselves and others accidentally. This is probably true. A heavy trigger pull is helpful for idiot-proofing. Sadly, it also makes it hard to hit anything. The other day I read that NYC cops are forced to use pistols that have extremely heavy triggers. That may help explain why they miss the people they shoot at.

I don’t like heavy triggers. When you go the the range and shoot 50 rounds, you will lose accuracy if your finger gets tired. When you shoot slowly and carefully, your finger spends a lot of time working, and after a few dozen rounds, it can start to tremble. This is a problem you don’t need when you’re wrestling with breath control and God knows what else.

If you’re happy hitting a man-sized target at 7 yards with a pistol, or hitting a deer’s huge kill zone at 100 yards with a rifle, a heavy trigger is fine. If you want to shoot WELL, it will be a problem.

My short-range pistol goal is to keep nearly every round inside a 1″ circle at 7 yards. I want to shoot 1 MOA (or as close to it as my guns will permit) with a rifle. I don’t want to fool around with heavy trigger springs made for old ladies and bro dudes.

I criticize the Marlin 60 because in the end, it cost me 15% more for a modified Model 60 than it did for a Savage A22 that worked perfectly out of the box. Even with the modifications, the Marlin was still completely inferior. Here I am, though, adding an aftermarket part to the Savage! Hey, it cost something like 9 bucks. Go price an aftermarket Model 60 trigger. No comparison.

Now I just have to learn how to use a scope correctly. I need to know where a bullet will land, regardless of the distance between me and the vile rodent in my crosshairs. Scopes are great for putting bullets exactly where you want to at the distance at which you zero them, but change that distance, and everything goes nuts.

I think accurate hunting must be much harder than shooting paper. A target shooter always knows his distance, he always shoots from the same position, and he should know exactly what the wind will do to his shots. Also, targets cooperate. They don’t run around or go behind trees. A hunter has to deal with unreliable targets at unknown distances, and he has to shoot from various positions, most of which will not work as well as shooting from a bench.

When I decided to shoot squirrels, I thought I was entering the minor leagues, but I was wrong. Minor leaguers hunt large animals. I can hit a deer over and over without understanding my scope. A total idiot can hit a deer. To hit a squirrel with a rifle, I have to know exactly what I’m doing. I have to know my ammunition and the way my bullet will behave at various distances.

If I shoot a .308 at a deer anywhere within 100 yards, even if I can’t figure out how much error there will be, I will still hit the kill zone. The error from shooting at a distance different from that at which I zeroed the rifle will never be more than a couple of inches. Big deal. But if you have a one-inch error when you shoot at a squirrel, you’ll probably miss him.

I feel like I finally have the right tool, and the right adversary, for learning how to use a scope. If I can learn how to nail squirrels, I’ll be able to hit anything. And I’ll be doing the world a favor, because squirrels are obnoxious.

If tomorrow brings me a couple of hours without rain, I’ll go out and see what the new gun will do. Wish me luck.

Squirrel Abuse in the Defense of Junk Food is no Vise

Friday, June 15th, 2018

The Best Tools are Scary-Looking

How much more joy can I stand? My Pana Hands third hand device for my Panavise arrived yesterday.

This is a pretty neat item. Constructed of a very nice cast base, alligator clips, and flexible pipe, it attaches directly to a Panavise and allows you to hold up to 4 things in place at a time.

The people who make it pack it in a nice box and include candy with it. Call it smart promotion. Call it entrapment. It worked on me. I was quite pleased to receive a packet of Starbursts with my tool.

Ufortunately, I’m not the only one here who likes Starbursts. As you can see, the Pana Hands caught a thief trying to purloin them, and it was in the process of administering punishment when I took this photo.

Do not ask me why a male over the age of 4 owns a stuffed animal. I have friends. They like to have their fun. That’s all I’m willing to say.

I think the menacing appearance of the Pana Hands is the best part. Even when it’s idle and the work area is dark, it’s there to scare burglars and children with its Dr. Octopus impression.

You can put a similar third hand device together for less money if you’re willing to order parts from Banggood and so on. I didn’t want to wait weeks and deal with whatever problems might arise from trying to match parts from different vendors. They sell assembled kits. I don’t know if any of them fit the Panavise. Do I really want to deal with Chinese shipping and mysterious return policies to save twenty bucks? No.

Today I plan to open my old Dremel up and see if I can use the Panavise to position it so I can solder a broken wire on the armature. I don’t know whether I can pull it off, but sometimes the process is more important than the result.

You can buy new Dremel armatures for $35.00, and that would be cheaper than a new Dremel. They’re very expensive now.

I looked at other hand-held rotary tools, and it appears they’re all junk, except for overpriced high-end tools and the offerings from Proxxon. I don’t want to blow $90 or whatever on a second Proxxon.

Rotary tools should be on everyone’s short list. Duct tape, impact driver, rotary tool. If you have these things, maybe 85% of life’s annoying challenges will succumb to your efforts.

I used a Dremel to cut a bed frame once. That’s how great these small tools are. I had a bed frame with sharp pieces of angle iron (actually steel) sticking out where I managed to drive my feet into them from time to time. I’m thinking the thickness was about 3/16″. I had like 4 tools at the time. I got out the Dremel and some cutting disks and cut the corners off the frame. It would have been hard with a tool like a saw.

Dremels drill, grind, cut, and polish. They probably do other things I haven’t thought about.

If I can get the Dremel working properly, maybe I’ll let the Pana Hands use it on the squirrel. I don’t like to be harsh, but someone has to make an example of household tortfeasors.

Me and my First-World Problems

Wednesday, June 13th, 2018

Things are a Little too Perfect

The upstairs workbench is coming along nicely.

Today I received my Bondhus folding hex wrench kits, plus a Real Avid gun cleaning mat with little plastic parts compartments. The mat is a few inches shorter than the top of my workbench, so it covers most of it. Really nice.

I haven’t put the bench to much use yet. I’ve worked a lot ON it, but I haven’t done a whole lot WITH it.

That’s not completely true. Part of the bench’s purpose is to store tools in a handy way. It certainly does that. Today I had to rewire a couple of fluorescent fixtures and install LED tubes, and everything I needed (wire stripper, wire cutters, pliers, LED headband) was hanging on the pegboard. I’m so glad I’m not walking up and down the stairs every time I need a screwdriver or a pair of pliers.

Here’s a shot of the bench as it now stands. The mat is under the new Panavise. You get the idea. I can work on stuff in the vise, and if I drop something, it will hit the mat instead of denting the bench. The vise has a parts tray, and if I fill that up, there are the compartments at the end of the mat.

I still need a nice drafting chair so I can sit at the bench with a beer and watch Youtube.

I also need to set up a charging station. I have a Jobmax, a Panasonic drill and impact driver, an electric screwdriver, and an action camera. I have to work something out. Ten years from now, there will be true universal chargers that work with every major brand of power tool, but as of today, if you use 7 different brands, you pretty much need 7 chargers and 7 wall sockets. Time to dig out another power strip and look for a cheap shelf sort of thing.

My unbelievable Chinese workbench came with a power strip that charges USB devices. These people thought of everything.

I bought another item from them. A stainless table.

My dad can’t figure out the microwave at this house. I got one which resembles the one he’s used to, and I put it on the counter. Problem: it sucks a lot of power. When he turns it on while he’s toasting bread, the breaker pops. I needed a table or cart across the room from the toaster so I could put the microwave on a different circuit.

I bought a stainless Seville Classics table with rubber feet and two wire shelves. It’s as nice as the workbench. It weighs over 50 pounds. The shelves are solid. The top is beautiful. It doesn’t wobble. It’s even NSF approved. I stuck it next to the pantry, and I’m hoping the socket behind it has nothing to do with the toaster’s circuit.

Even if the breaker still blows, now I have three new horizontal storage areas, and I cleared a lot of junk off the counter.

The stainless table doesn’t have a particularly homey look. I thought about it, and I decided to go with it. My dad makes messes, and I need things that can take abuse. I also want things that can be cleaned easily. I’m a man, so a commercial-looking table won’t bother me.

This table will hold a thousand pounds. Not sure what that’s all about. Maybe some day I’ll use it as a shop table.

I will probably get to use the Panavise tomorrow. My set of “third hands” will arrive, and I want to use it to hold my old Dremel while I try to repair a wire on the armature. That will be sweet, even if I can’t fix the Dremel.

The table is great. There are cheaper ones on Amazon, but the reviews are lukewarm. The reviews for the one I got are like, “My GOD. I never knew a table could be this wonderful.”

I’m pooped. Carrying the table into the house and putting it together alone were more exertion than I expected. Then I had to go get a ladder and fix the fluorescent fixtures.

It’s time to sit in the indirect glow from my workbench light and relax. Maybe a little Forged in Fire.

I am trying not to think about the things I still have to do to get my machine tools up here and get the real workshops set up.

More Stuff That Works

Monday, June 11th, 2018

I Need Elves

Now that I’m done writing important things for today, I will relax. With more writing.

I am still working on my indoors workbench. I got myself some Stanley pegboard hangers and installed them. They’re on the flimsy side, unlike the hangers that came with the workbench. That makes them look “off.” What can you do? Life isn’t perfect.

The hangers came with little plastic anchors that hold the steel hangers in place. One problem with pegboard is that the hangers tend to come out with the tools. Anchors prevent this from happening. Kudos to Stanley. Now they need to make their hangers heavier.

The pegboard hanger market is wide open. Almost everything made is junk. I’m not buying anything else until I find a good solution.

I have sad news to report. As much as I love my new Bondhus hex wrenches, I am getting new ones. The explanation is simple. Bondhus puts its wrenches in little plastic holders. You have to do a lot of pushing and pulling when you use them. Pull a wrench out. Find out it’s too big. Push it in. Pull another out. It sounds unimportant, but during a long session involving different screws, it gets old.

My solution: more Bondhus hex wrenches.

I have an old Craftsman folding hex wrench set. The wrenches are set in a handle, like pocketknife blades. If you fold out the wrong one, you just fold it back in and pop another one out. Bondhus makes something similar, but you get three sets. You get metric, standard, and Torx. Small, convenient, and tough.

I hate Torx fasteners. There is no reason for them to exist. Generally, in my opinion, they are used to make things hard to work on. I really believe that. If you buy a set of “tamper-proof” driver bits, it will include Torx bits. That tells you something. I hate spending good money for something and then finding out the manufacturer has sabotaged me in order to get me to pay someone to fix it.

When I work on my own property, I’m not “tampering,” but screwing with my property so I can’t fix it fits the definition pretty well.

The folding wrenches won’t replace the L wrenches I already have. The long wrenches have ball ends which are very handy. Ball ends let you turn fasteners when you can’t insert wrenches parallel to the fasteners’ axes. Sometimes I’ll need the long wrenches. Most of the time, however, the folding sets will do the job.

I also learned I needed a workholding device. I will tell you how I found out.

The other day I sold my dad’s NordicTrack ski machine. He can’t use it, and it was in the way. It’s sad, but sometimes I have to do things he doesn’t want me to do. There was no way he would have agreed to sell it, because he feels compelled to hold onto things. I put it on Craigslist anyway, and now it’s gone. AHHHHH.

The machine had a cheap electronic monitor on it, to provide pulse info and so on. It didn’t work because my dad didn’t change the batteries. It was corroded inside. I took it off to work on it, and it slid all over the workbench. It was very annoying. I wanted it to work for the guy who bought the bench, and he was on the way in his truck, so I didn’t need the bother of fighting with a slippery monitor. I also had problems when I tried to fix my Dremel’s armature.

You can screw a vise to a workbench, but it wouldn’t be appropriate for me. I want to have the workbench top clear most of the time, and I don’t need the solidity of an attached vise. I have such a vise in the workshop if I need it.

I found a thing called a Panavise. It’s a crazy vise that opens to 9 inches. The jaws are held on a ball mount, and the mount can be moved around and fastened in position. The jaws have rubber on them, so they would have worked fine on my dad’s plastic monitor.

You can screw or clamp a Panavise to a table, but they also make a base which is a weighted tray. You attach the vise to it and rely on the weight to hold it in place. This will work 99% of the time. The tray has little compartments for parts. SOLD! It ought to work very well for me.

Bonus: you can buy an attachment with four long flexible arms with alligator clips. It fastens to the base. The arms reach up to the vise and help you hold little things like wires. I need that. Obviously.

I haven’t sprung for the arm thing, but I’m getting the vise.

Panavise makes a special kit for soldering. I like the special clamp for circuit boards, but the other stuff seems gimmicky and useless. The full kit includes a solder iron holder and a tip cleaner. Every decent soldering iron comes with these things. The clamp is sold separately. I will consider it.

I also needed something to hold guns while I work on them. I learned this while working on my new rifles. I decided to get a Tipton Gun Butler. This is like the little housecleaning trays maids use. It’s a rectangular buckety thing with a handle in the center. It has two V-shaped mounts you can set up at the ends. You rest the rifle in the mounts, and you keep your cleaning stuff in the bucket. Yes. I want it. It’s cheap, and I think it will be perfect for me. It arrived today.

My previous gun cleaning kit was a cardboard box half-soaked with Hoppe’s No. 9 and Break-Free CLP.

As I think I mentioned previously, I also ordered a gunsmith’s mat. This is a rubbery mat you put down on a table when you work on a gun. The one I bought is just the right size for my bench, and it has a few plastic compartments for parts. I would want this even if I didn’t have guns. It’s okay to beat up the surface of a bench you made from raw lumber, but I don’t want to destroy a nice factory hardwood top prematurely, and I will really need those part bins. Also, the hard bench top can damage things, so a cushion is desirable.

Speaking of bins, I have discovered plastic bins that attach to pegboards. I plan to get some. I hate watching small parts slide off of workbenches. I hate having no place to put small parts I’m not ready to throw out or put away. A few little plastic bins would be very helpful.

I hate to say it, but a rolling tool chest is under consideration. I’m pretty sure I can get a good price on Harbor Freight’s new “Series 2″ chest. The first version was very good, and the new one has drawers that open farther.

I’m disgusted with the companies that make expensive boxes. Look at Youtube, and you will see people comparing Snap-On to Harbor Freight. The verdict? Harbor Freight gives 90% of the performance for 15% of the price, and 90% is more than you need. And Snap-On is manufacturing in China now! You’re not even supporting America when you let them gut your retirement fund.

You can get SIX Harbor Freight tool carts for one Snap-On. Not four. Not three. SIX!

I spent $400 on a gigantic Milwaukee rolling chest, and it has been phenomenal. It’s tough. It’s practical. You can stand in the bottom drawer. It has a power strip built in. If Milwaukee can do it, so can everyone else. A similar Snap-On product sells for…sit down…$2600. The Snap-On is 6” shorter and has a couple more drawers. It probably has some features the Milwaukee doesn’t. Good luck convincing me those features are worth $2200 plus shipping.

A rolling tool chest may be overkill for my little work area, but a total piece of garbage with much less capacity will run me about a hundred bucks, and Harbor Freight will fix me up for life for about $230. Tempting.

Harbor Freight boxes aren’t just very good “for the money.” They’re very good, period. Not great. Very good. And very good will do.

I wanted a farm, and now I have one, along with a big house. That means I find myself using tools a lot. I actually need the things I’m buying. I still need other stuff, like a trailer, fencing pliers, and post-hole diggers.

This sure beats spending money on things like golf and fishing, which are inherently frivolous. You can use a couple of poles to feed your family, but no one needs a seagoing boat and big-game reels.

Life is good, especially with tools. I will continue to report as my techno-arsenal grows.