Saiga Taking Shape
November 18th, 2009I Will Adorn it With Crosses in Honor of My President
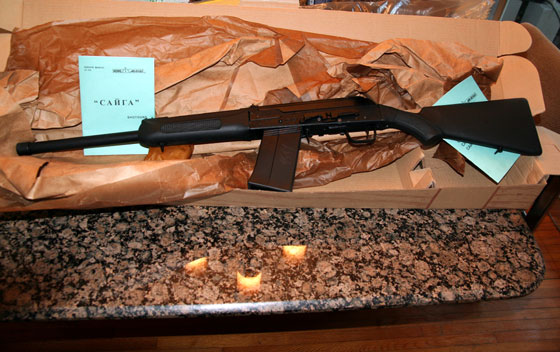
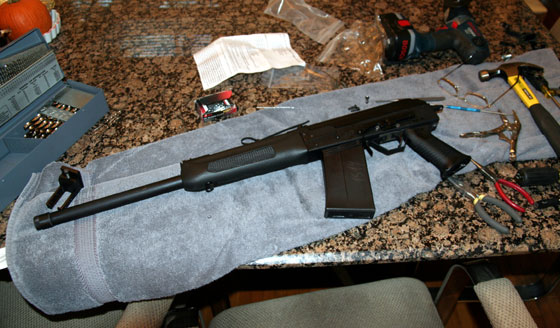
I got my Saiga-12 fixed up. I haven’t machined the receiver for the new buttstock, but I got the new trigger guard and fire control group installed. The buttstock will be very easy compared to this other stuff.
I learned a lot from the people at Saiga-12.com. They are extremely helpful and patient.
Some tips for people who do their own conversions:
1. Go to the forum at Saiga-12.com for help. Those guys are fantastic.
2. Don’t forget to take out whatever is retaining the trigger and hammer pins before trying to tap them out of the receiver.
3. Use a center drill (Google it) to start the holes when you drill out the rivets on the Hillary-style trigger guard and the old trigger group. Use a drill press or milling machine to start the holes on the trigger guard rivets, if possible.
4. When you take out the bolt hold open lever and spring, make sure you sketch the location and orientation of the parts. They make no sense, and if you look for pictures online, you’ll find stuff that’s misleading.
5. When you put the gun back together, install the safety lever first. Trust me.
6. If you have a Tromix fire control group, the big V-shaped retaining spring for the hammer and fire control group pins should be oriented with the point of the V toward the back of the gun. If it won’t click into place, open the loop at the point of the V slightly and try again.
7. When you install a Tromix fire control group, the hammer goes in backwards.
8. To reinstall the BHO lever and spring, do this. Drop the trigger in. Put the pin in it. Make a 1/8″-long (or shorter) bend in the short end of the spring, so it catches the little projection on the lever. Drop the spring into the receiver. Run the pin through it, into the far side of the receiver. Drop the BHO lever in. Make yourself a tool from a paper clip (don’t use a dental pick). Straighten the clip and make a tiny hook at one end, just big enough to hold the spring wire. Make a bigger hook at the other end, big enough to go around a screwdriver shaft. Catch the spring end in the little hook, put a screwdriver in the big hook, and use the screwdriver shaft as a handle to pull the spring end toward the muzzle of the gun. You should be able to drop the spring end onto the projection on the lever. This tip is worth its weight in gold. You don’t need the BHO lever, so you can throw it out if you want.
I find it amusing that “BHO” stands for “bolt hold open” as well as B. Hussein Obama.
9. Don’t worry about scratching the finish on the gun, because it’s no good and will need to be replaced. Use aluminum oxide 120 grit to blast the old crap off, and then coat the gun with Norrell’s moly resin or Brownell’s aerosol equivalent. You can use Norrell’s on the inside of the receiver, because it’s too thin to interfere with moving parts. Not sure about Brownell’s. Glass bead blasting will result in a finish that falls off.
That’s about it. I learned some of this stuff from experience and some by begging and Googling.
Now it’s time to relax and have a healthy dinner of ham hocks, fried apples, and mustard greens.
Pre-conversion:
Post-half-conversion:


November 18th, 2009 at 6:25 PM
Very cool!
November 18th, 2009 at 7:52 PM
I did pretty much the same conversion on my Saiga Sporter 7.62 a couple of years ago. It was a lot of fun and I did it with only a drill press. The only difference in mine and yours, I put an adjustable stock in back. Also I had to build a ramp so the 30 rnd. mag would feed the barrel correctly.
November 19th, 2009 at 11:16 AM
Why would you sketch the location and orientation of parts when you have a digital, camera at the ready?
November 19th, 2009 at 11:53 AM
What about people who don’t have a digital camera?
November 19th, 2009 at 1:53 PM
OOH! I like your bit set. I am looking for a bit set with lots of hollow ground standard driver bits in lots of sizes for gun use. I will probably need to bite the bullet and go with the Wheeler Engineering set, but would love to find a source for just loads of hollow-ground standard bits (I am overloaded with hex, TORX, and Phillips bits already).
November 19th, 2009 at 1:55 PM
Those are cobalt bits from Enco. They were on sale for over 50% off. May still be.