Catch .22
May 15th, 2018One Bubba’s Experience With the Marlin Model 60
This week’s big triumph: I got my Marlin Model 60 .22 rifle set up so it actually works. I installed an M*CARBO trigger kit, plus sling studs.
I needed the trigger job badly. The Model 60’s trigger is so bad people complain about it all over the Internet. To shoot, you pull it back about half an inch, and then you squeeze like crazy and hope something happens. The factory pull weight is so hard, if you shoot a Model 60 after shooting a normal gun, you may think the safety is on. That happened to me.
When a gun is hard to fire, you will tend to take longer to shoot, and the gun’s point of aim may wander while you’re focused on making it go off. It’s very annoying. I suppose you can overcome it, but who wants a lousy trigger?
There are two outfits that I know of that sell Marlin 60 triggers: M*CARBO and some guy whose Internet handle is Arrowdodger. Mr. Arrowdodger sells the KAT trigger, which is supposed to be the very best. I will never know, because he doesn’t respond to inquiries. I don’t know if he’s ill or what, but I gave up. M*CARBO sells a kit which includes a trigger, a bunch of superior springs that go in the general region of the trigger, and replacement recoil springs.
One of the irritating things about the Marlin 60 is that it is not up to the task of firing hypersonic .22 ammunition like CCI Stingers. It’s 2018, and you would think Marlin would have gotten with the times. They have not. According to M*CARBO, you can shoot Stingers and similar rounds if you use a better recoil spring.
They sell two springs with their trigger kit. One is for hypersonic rounds, and the other is for standard velocity. They claim the hypersonic version will work with standard velocity rounds, so I decided to install it, failing to see the advantage of a weaker spring that only works with one kind of ammunition.
M*CARBO (boy, is it annoying typing that) has excellent videos on its site, telling you how to install stuff. I used the video for the trigger kit, and things went well. One minor thing: you should use plastic tools to remove the E-clips on the gun’s receiver. I used a screwdriver, and now I have tiny scratches in the bluing. These scratches are not visible when the gun is assembled, but still.
I got the gun put together and took it outside. I only fired a few times. I used standard velocity ammunition to make sure the recoil spring worked with it. No problems. The trigger is wonderful. You can tell when the gun is going to go off, and you don’t have to be a bodybuilder to shoot it.
Now I can use a wider array of ammunition, and there is some hope that my game will not run off while I’m straining to shoot.
I needed a sling for the gun. It’s annoying, carrying a gun in your hand all day, and without a sling, you have nothing to wrap around your arm to give support when shooting offhand. I had some studs I bought when I got the gun. Studs are little metal things slings attach to. Many guns come with them. The Marlin only cost $170, so you don’t get a lot of frills.
When I bought the gun, I didn’t know it was hard to put a sling on it.
Ordinarily, you run a wood screw into the forward part of a rifle’s stock, or you put a nut inside the stock and use a stud that has a machine screw for a base. To do these things, you have to have some wood to work with. You need maybe half an inch of wood for a wood screw, and in order to use a machine screw and nut, you need to have at least a quarter of an inch of wood clamped between the nut and the stud base.
The Marlin has a tube magazine, like a second barrel, under the barrel of the gun. This takes up room in the stock, and it displaces the wood you need in order to attach a stud. The wood up front appears to be less than 1/2″ thick.
The classic solution to this problem is very bad. You put a normal stud on the buttstock, and you use a special front stud with a ring on it, to clamp around the tube magazine. This puts a lot of strain on the flimsy magazine. It’s a stupid idea. I wasn’t having it. I decided to use the machine screw stud and nut.
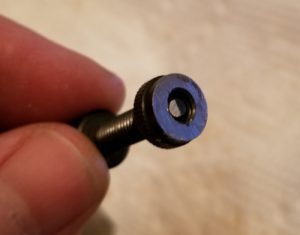
The nut on the stud was about 1/4″ tall. That’s too much. I wanted to have at least 1/4″ of wood under the nut after the installation, and I needed the nut to be sunk into the inside of the stock so it would be out of the way of the magazine. I needed a nut somewhere between 1/8″ and 3/16″ tall, and I needed a counterbored cavity inside the stock for the nut to sit in.
I took a belt grinder and thinned the nut down to a little over 1/8″ in height. I didn’t need 1/4″ of threads to make the stud work. It wasn’t going to be under that much stress. What I ended up with was more than adequate.
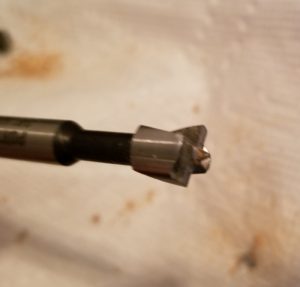
I used a 3/8″ Forstner bit to start a hole inside the stock. I couldn’t use a drill, because the U-shaped bottom of the inside of the stock wouldn’t permit the bit to rest flat and stay in place. I held the bit in my hand and turned it slowly until I cut away enough wood to get the bit down on the bottom of the interior. After that, I put it in a drill and made a cavity deep enough to sink the nut.
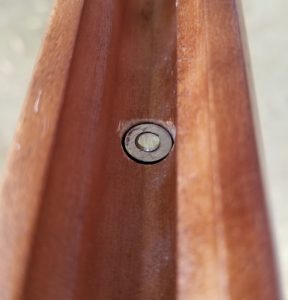
I took a very small drill bit, placed it in the center of the cavity, and drilled through the stock. I put paper towels and a block of wood under the stock to minimize tearout. This gave me a pilot hole for the machine screw hole. I used a bigger bit to enlarge the hole, and I was all set. The nut fit in the cavity, and the stud tightened up in it nicely.
I still had about 1/4″ of excess screw sticking out into the inside of the stock. I took everything to the belt grinder and slowly shortened the screw until it was below the deck. Sweet.
It looks fantastic, and it works perfectly. Much better than yanking on a magazine tube.
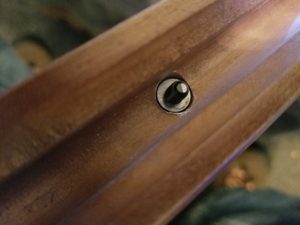
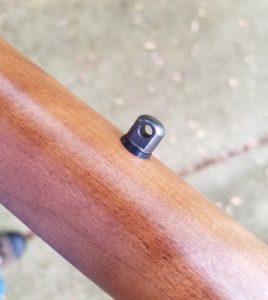
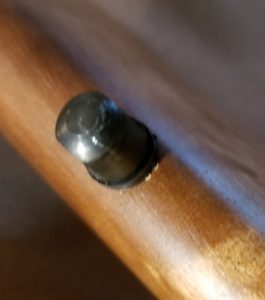
The buttstock stud, which should have been easy, was harder to install. The wood used in the stock is very chippy and teary. I knew that from installing the front stud. I had to drill a hole for a wood screw in the rounded bottom of the buttstock, without ripping up the wood.
The directions said I had to create a 1″-deep 5/32″ pilot hole for the screw, and that I had to open the first 1/4″ of the hole up with a 7/32″ bit. No problem, I thought. I drilled a starter hole with a very thin bit and finished with the 5/32″. Then, thinking I was clever, I used a rotary stone from my Proxxon kit (like a Dremel) to chamfer the daylights out of the hole’s opening. I thought this would make tearing impossible. I was wrong. It tore anyway. Now when you look at the stud, you can see a tiny area of torn wood.
This was exasperating. I did my best to prevent it from happening, and it happened anyway. I should have done the entire counterbore with the stone.
I can fix the tearout with filler and stain, and I guess I will. No one will ever see it unless they look at the picture I took. Lesson learned.
Now I’ll be able to carry the gun like a civilized person. I’ll be able to shoot it with a sling. I’ll have a pleasant experience when I pull the trigger.
This gun has really shaped up. It’s going to be superb. Much better than I had hoped. If you don’t mind tinkering with your firearms, you would do well to get one of these things.
In the end, with a sling and scope, it will be about a $350 .22 rifle. That’s not so bad. I felt great about paying almost that much for a .22 pistol with no additional doodads at all.
It’s going to be a real squirrel killer. It may do well on coons and other things, too.
The wood is gorgeous. It has tiger stripes and swirls all over it. It’s so nice, I am tempted to have someone refinish it to bring out the grain. I’m afraid to do it because I am not good with finishes.
I’m no gunsmith, but I had no choice here, unless I wanted to pay a real smith a fortune to fix up a lowly .22. That was not going to happen. I think I did well. A few tiny scratches no one can see, a tiny tear I can fix, and a new and superior method of attaching a sling to a Marlin 60…I’ll take it.
Now that I have a forward stud, I can use a bipod. One of these days I’ll go out back and see what she’ll do. I fully expect 1/2″ groups at 50 yards. I don’t think I can be highly consistent with 3.5-cent ammunition, but I should do well enough to make rodents tremble. That’s all I’m after.
Hope your shooting endeavors are going at least as well as mine.
May 16th, 2018 at 7:27 PM
Looks like you did very good work with the stud installs. I might have used epoxy on the forearm nut, but I tend to over do things sometimes. May it be the varmint terminator!
May 16th, 2018 at 7:56 PM
Thanks, Mike. I was going to glue it, but it worked without it. Now if I can just get that chip filled…
May 17th, 2018 at 7:17 AM
Patching may look worse than not. You might try whatever repair method you come up with on the inside of the stock first to see how well it matches. I’m a if it works use it kind of person anyway. Maybe the first brier scratch will land right on the small defect giving it character. You know how it goes, ” Oh that scratch? There was this world record tree rat up this live oak surrounded by monster two inch thorned bamboo briers and the only way to attack him was stripping down naked, covering myself in mud and crawling into the almost impenetrable wall of thorns to set myself up in the perfect ambush position for the perfect kill shot. He fell graveyard dead in my prepositioned cook pot”.
Most of my stuff looks well used. I do have a few pistols that aren’t beat up but the long guns all have either inept gun plumbing scars or hard use dings and scratches.
Good shooting!