Nuts to Me
July 25th, 2014The 4-Jaw has Landed
I have another machining update. I sometimes wonder if I should put so much of this material up, since some people come here for spiritual stuff. But on his own blog, a blogger is a dictator who answers to no one, so here I go.
My first rotary table was a 10″ Phase II. I wanted something big so I would not run into the tool-user’s curse, which is needing a bigger tool ten seconds after you unwrap the one you just bought. Phase II tables are made to mate with 3-jaw chucks one size smaller, so I put an 8″ chuck on this table. Together, these items weighed so much I could not lift them well enough to move them. At least I don’t think so, because lifting the table all by itself is risky. I don’t think I’ve ever lifted them when they were joined.
Eventually, I decided I had had enough of moving this thing, and I decided to get a 6″ table. Unfortunately, Enco had a great price on 8″ tables, so that’s what I bought. And I bought a 6″ chuck for it, because mating an 8″ 3-jaw chuck to it is virtually impossible.
Had I bought a 6″ table, moving the table and chuck together would not be all that bad, but with the 8″ job, I have to separate them.
Generally, my solution to this problem is to leave the table on the mill all the time. I have not yet had a job big enough to make it necessary to remove the table. The 10″ table was a little annoying, but the 8″ one is reasonably unobtrusive when I’m using the vise.
I can tell you find this post exciting.
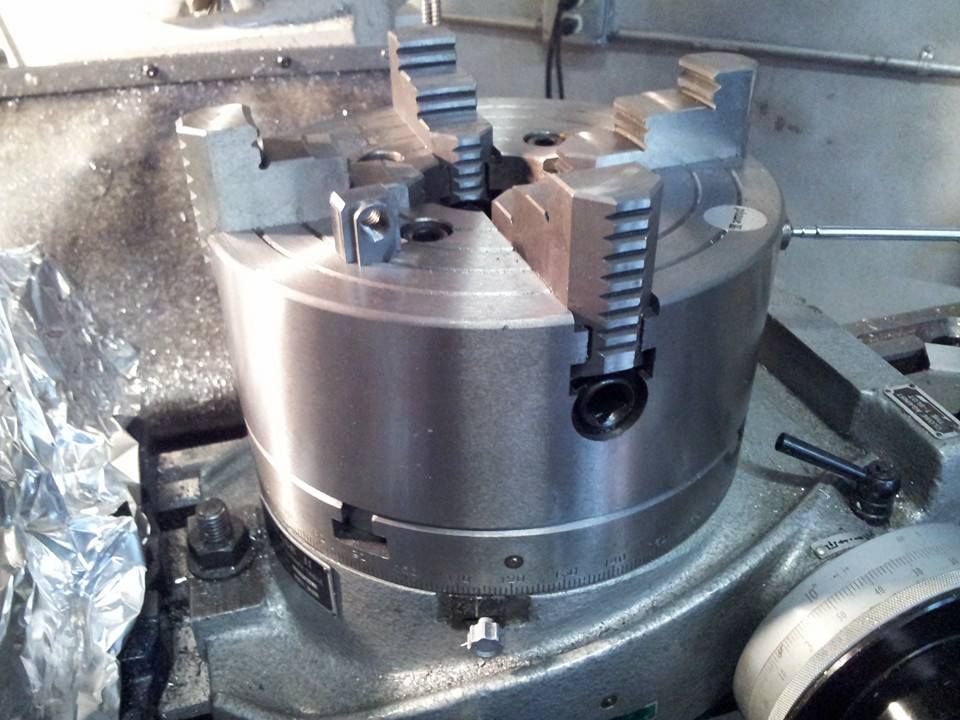
One of the aggravating things about having a 3-jaw chuck on a rotary table is that every time you remove the chuck (which is necessary in order to clamp stuff to the table), you have to use a dial indicator on it when you put it back on, to make sure it’s centered on the table. A while back, I got the bright idea of using a 4-jaw table instead. It would be 2″ bigger, because 4-jaw chucks are less annoying to mount, and I would not have to indicate it.
I totally forgot that I would have to indicate EVERY SINGLE PART I put on it. But that’s okay. It can do everything a 3-jaw can do, it holds bigger work, and it allows you to machine irregular parts. You can also machine stuff that isn’t centered, and you can use the chuck as a faceplate if you remove the jaws.
Sold.
I ordered an 8″ Phase II chuck. It looks fine, but it came with a lot of grit in it, and the machining in the jaws and slots is somewhat crude.
When I asked Phase II if there was an adapter plate for mounting it, they told me there was not. I thought I would have to make one. But the chuck has 4 holes for mounting cap screws, and there are 4 T-nut slots in the table. Measuring carefully, I realized that the slots were juuuuust deep enough to permit mounting the chuck on T-nuts. Problem: the nuts I had are rectangular, and the slots are semicircular at the extreme ends, so the corners on the nuts prevent them from going all the way in. I had to machine the corners off or make new nuts.
I suspected the nuts were hardened, and they were too small to machine easily, so I got out a 3/4″ by 1/2″ bare of 1018 steel and made new nuts. Here is a shot of part of the process. It got prettier later on, but this is my first effort.
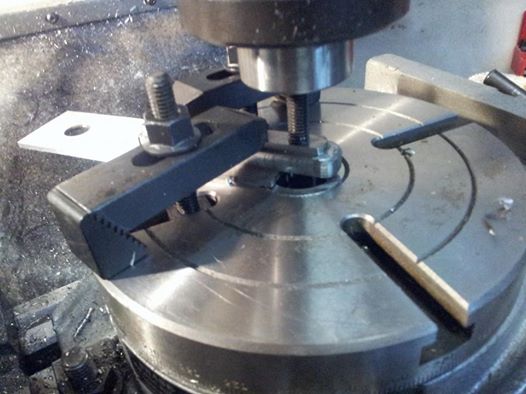
That thing in the collet is a stud. I used it to center the screw holes under the spindle. Later I made a tool from 1/2″ aluminum rod. The end was turned to an unthreaded diameter that fit snugly in the tapped holes. I put the tool in the collet, used it to center the work, clamped everything, and replaced the tool with a 1/2″ cutter.
The job was simple. First I made a long bar of steel with the same cross-sectional profile as a nut. It was 0.700″ wide at the bottom, and it had two shoulders cut into it so it was 0.450″ wide at the top (the name “T-nut” comes from this shape, which is an upside-down “T”).
Then I drilled and tapped several M10 x 1.5 holes through the bar, for the cap screws.
After that, I clamped the bar to the rotary table and machined two radii into the end. I used the band saw to cut the bar into individual nuts. It was a fairly pretty operation. I had to do some filing to get the last few thousandths of necessary clearance, but now I have this:
You can see one of my round nuts on the table. That’s a crude one I made as an afterthought. It doesn’t have a pretty round end on it like the others.
Under that table, there are two nuts with one hole each and two nuts that have two holes each. I was going to cut them down, but I thought maybe I would get some type of versatility if I had different types of nuts, and it saved me some work, which was probably my primary motivation.
My next project is to make special T-nuts that fit the jaw slots. I have been told this will damage the slots, but I think that’s wrong. I can make them from brass or aluminum, so they’ll be softer than the table, and I can make them long, so the pressure is distributed over a wide area. I got this idea from my 10″ 4-jaw (on the big lathe), which already has faceplate slots cut in it. Granted, these slots are separate from the jaw slots, but I still think my idea will work. It would make it totally unnecessary to remove the chuck when clamping things. If I don’t like the way it works out, I can always make a round, thick aluminum plate, attach it to the chuck through the existing screw holes, and mill or fly-cut it so it’s level. I can mark it so it’s always mounted the same way, and that should give me reliable flatness every time I bolt it on.
Now that this is behind me, I can move on to the assembly of my CNC lathe’s control box (probably the wrong term for it). It will house the power supply, controller and drive board(s).
Stuff is getting done. The backlog is dwindling. Praise the Lord.
July 26th, 2014 at 10:59 AM
It is a good idea to have a small crane. An engine hoist works well but an A-frame is often better. Clamp an eye in the chuck and lift.
July 26th, 2014 at 4:23 PM
Someone suggested I get a cart, so I could shove things off the mill table onto it. Back then the garage was too cluttered. Might work now.